Installing Windows Small Business Server 2011 Standard Part 3

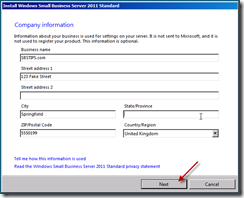
You should now have the Company Information screen, where you can enter business address and contact details.

The personalise your server and network screen, where you choose your Server name and internal Domain name.

This may be the single most important screen you have to configure in the whole installation. This stuff cannot be changed – ever! so take your time and get it right, no second chances or forgiveness for typo’s!

A tip i picked up in the SBS 2008 era, (in this book) was to use a generic name for both the server and the domain. You should have read that book already so i am not going to repeat it, but suffice to say it makes things a lot easier if you ever want to merge with another network.

Server Name : SBSSERVER

Internal Domain Name: SBS

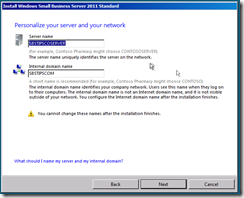
When you’re happy with your choices, hit next.

We now have the ‘Add a network administrator’ page.

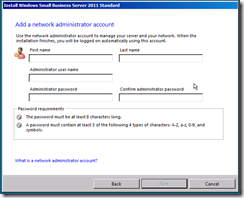
As was the case with SBS 2008, the Administrator account is unavailable for use here, so you must choose a new name and password.

Please enter somethng unique, and not to obvious to guess – Admin – for example is a bit of a waste of time. Another tip for you that we employed was to use the initials of our consultancy and that of the clients company, anyway you choose whatever you want, i am choosing Don Funk (thanks to Justin and Wayne for that one )

You’ll also need to enter a strong password. 

Remember this is your Domain Administrator password, it should not be Password1 and it should not be written down and stuck to your monitor!

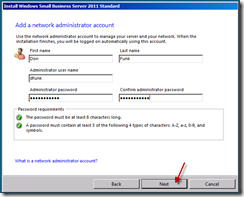
When you have entered all of this information, Click Next.

You will now see a summary page, this is your chance to confirm and or change anything you are not 100% happy with.

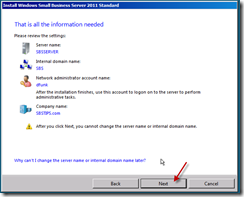
Click Next when you’re ready.

The server will now shutdown and restart, when it boots back up you will have a period of time to wait whilst the server expands and installs the SBS installation. You can choose to sit and wait and read the inspirational messages about how much more efficient your company will be once the install has finished and how the integrated management console will add value to your business, or you can take a break for about 30 minutes and finish that coffee.

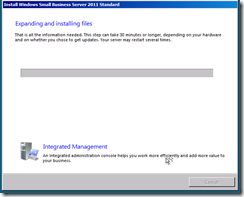
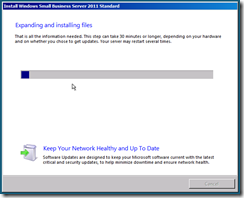
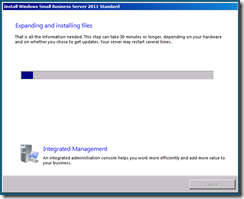
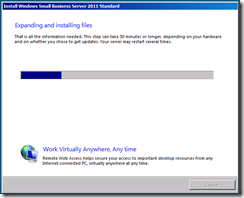
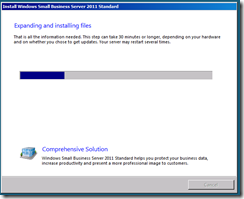
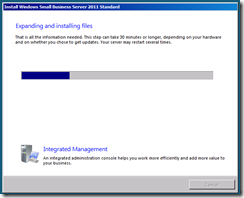
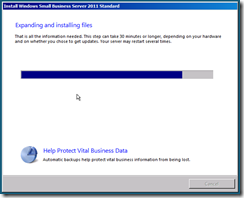
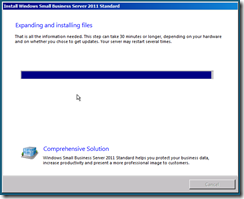
Your server will reboot a few times during this period, and with any luck after about 30 minutes you will be presented with a Successful Installation message.

Once your server has finished the installation, you will have several configuration tasks to complete, including configuring the backup, and updating windows adding your users and joining your computers to the domain.

For now, why not congratulate yourself on a job well done.

OK so… That works.

Having spent several hours working on my IPCOP install article, it was proving to be a bit of a pain to upload it.

I broke it down into 3 smaller articles, that are now of course, published in reverse order as you scroll this page.

Here are the links to the individual entries..

Part 1

Part 2

Part 3

Hope it may be useful to you!

Installing IPCOP as a Hyper-V Guest – Part 3

You will now have the chance to configure your keyboard mapping, time zone, passwords, and additional interfaces.

Select your keyboard layout using the TAB key, and again, TAB down to OK.

Repeat for your Time Zone

Next enter the hostname you would like, and TAB down to OK.

Choose an internal domain name, and TAB down to OK. I am leaving mine on the defaults. IPCOP.localdomain

Now you can configure your ISDN interfaces… what? you don’t have a brook trout ISDN card? Oh, well if your like me, and you DON’T need to use ISDN, i would choose to disable it.

TAB across to DISABLE ISDN and hit SPACE to accept.

Next we need to choose our NETWORK CONFIGURATION TYPE.

If you have followed the above advice you will need to choose GREEN + RED then TAB down to OK.

You will see a screen showing ‘pushing non local network down’

You’re then returned to the Network Configuration Menu.

Select Drivers and Card Assignments.

You will see your TULIP card is assigned to the GREEN NIC, but RED shows as UNKNOWN (UNSET)

We do wish to change these settings, so select OK.

Again you will see a screen showing ‘pushing non local network down’

You will now see a message about an unclaimed NIC, you can assign this NIC to RED, select OK.

All cards are now successfully allocated.

You can now set your address settings for your NICs.

We have already configured the GREEN NIC, so select RED and select OK.

This section will vary dependant on your own lab setup. I have my RED NIC set to use DHCP, and i have a DHCP server on the LAB network handing out an IP to it. Make sure you have a valid address to hand if you want to statically assign this.

I’m setting mine to DHCP.

When you’re ready, select DONE.

If you have selected to use a STATIC configuration on the RED NIC, you will then need to go ahead and enter DNS and GATEWAY information on the next menu.

You can also configure IPCOP to be a DHCP server,but we do not need to do that for this setup. You will be prompted to do this after selecting DONE on the network configuration menu.

When you’re happy with you configuration, select DONE.

On the DHCP Server Configuration menu, leave the defaults and select OK.

Make sure you don’t hit CANCEL at this point like i just did, if you do, i can’t say what your results will be like, so probably best to start over!

If your smart, and you don’t hit cancel, you can now enter your ‘root’ password. This is just used for console access.

As this is a lab system i am going to enter ‘password’ you won’t actually see the characters as you type them, TAB down to confirm, and TAB down to select OK.

Next is the ‘admin’ password – this is used when accessing the web console.

Now enter a password to be used when doing an export of your backup key.

Setup is now complete.

Your IPCOP VM will now reboot, and you will be able to access the web console of your system from a locally connected VM.

Your system will boot and you will see an ‘ipcop login:’ prompt when it has booted up.

The console is not something i have used to configure IPCOP so i will refer you to their documentation for configuration tips.

Update – 10/02/2016 Please see below comments re updated port numbers for IPCOP Login

If you logon to a locally connected VM you can access the console at: http://192.168.16.254:81

You will get redirected to an HTTPS site – so don’t be alarmed if you get a certificate warning.

If you want to get really clever with it, you can then start to use the firewall on the IPCOP to publish services on the ‘internal’ / ‘GREEN’ network, which you can then access from your physical network.

And there you have it, an operational NAT device to separate your Hyper-V guest machines.

Installing IPCOP as a Hyper-V Guest – Part 2

I think i hit the limit for blog entry size – so have had to break this up into several entries.

Before we power it up, we need to add some network interfaces. As mentioned above IPCOP does not support the use of the Hyper-V synthetic NIC, so we need to add a ‘legacy’ network adapter. Well, two to be precise. As this is going to be our NAT device we need both an internal and an external interface.

So, lets go into the settings of our VM, Find your IPCOP machine in your VM list and right click and click settings.

This opens the Add Hardware section of the VM settings, select Legacy Network Adapter, and click Add.

You are now on the Legacy Network Adapter settings page, where you can choose which network this NIC will be connected to, the MAC address settings and the VLAN settings.

I am possibly showing my inexperience with Hyper-V now, but i have chosen to add this NIC to the ‘Private’ VM network i have created (a network just for the vm’s) and i also have mine set to use a dynamic MAC address.

When you’re ready hit ok, and the NIC will be added. Repeat the process so we have one NIC connected to the Private network for VM’s and one connected to the External network.

In my setup, the first NIC i add or rather the first NIC installed into the Hyper-V guest,  is the interface IPCOP treats as it’s GREEN interface. More on that in a bit.

Now that we have our NIC’s added we can boot up our VM. Close down the settings window and go back to the Hyper-V management console. Double click your IPCOP VM to open a connection to it, and hit the power button to power it up.

Your VM will start to power up, you will need to press enter when prompted to enter the IPCOP setup.

Choose your installation language.

Select OK to continue the installation.

Since we are using an ISO file as our installation media, it is ok to accept the defaults on CDROM/USB Key

The setup will now probe your hardware.

Select OK for the installation to being formatting and partitioning your virtual hard disk.

This process may take some time, so why not get your self a well earned coffee, or beer?

I mean – this takes a really long time – my system is a Quad Core Xeon, and this VM has 1gb of ram and it takes roughly 25 minutes.

If you hung around by your screen long enough you will have seen a few screens flash up, one saying installing files, another making swap space…

If not, you will have come back to see a screen saying, if you have a backup configuration of IPCOP you can now restore it. I’m assuming you don’t, so we will choose to skip this by selecting ‘Skip’ Press TAB to switch between options, and then press SPACE to select.

TAB down to OK to continue.

The next screen will attempt to PROBE for you NIC. I think that is the first time i have used the word PROBE in an article, and i don’t often use it in every day conversation either. Is it odd I’m enjoying the use of the word probe? I do though…. PROBE.

Sorry, side tracked there slightly.

So we are Probing for our GREEN interface. This is the interface that is considered ‘safe’ and will represent our internal network.

Press space to start Probing.

You will see a list of NICs whizz past, and hopefully it should settle on something. I am not going to say what it will settle on, as i am not sure if it is dependant on what type of Physical NIC you have in your system, mine has chosen – Digital 21x4x Tulip PCI Ethernet card.

Select OK.

We need to enter our Internal IP address now for the IPCOP system. I am a bit of a traditionalist so i keep my SBS boxes on the 192.168.16.x/24 range. So I’ll put the IPCOP on 192.168.16.254

Type in your address, including the ‘.’ and when you’re ready TAB down to OK.

You will then see a quick screen flash up saying installing GRUB, and then it will confirm a successful installation..

You’re only choice here is to read the notes, and hit OK.

Part 3


Testing Testing…

Just testing the Windows Live Writer upload – as it is failing my IPCOP article.

Installing IPCOP as a HYPER-V Guest – Part 1

As part of my lab setup, i wanted to allow my guest operating systems (such as SBS 2003 / SBS 2008) to act as close to ‘real life’ as possible.

What i mean by this is i want them to be separated completely from the rest of my home network, and as such, be able to run DHCP and other services without conflicting with my router.

Now, some of you Hyper-V experts will probably say – oh well you could just do X and then it will work fine. Well, that is fine for you, but as i don’t know what X is – i have chosen this option, as recommended by a very good teacher.

So the solution proposed by said teacher, was to download and run IPCOP as a Nat device, bridging the gap between the virtual machines and the physical network.

What do you need?

A machine running Hyper-V (obviously)

The IPCOP ISO (here)

You may want to review the system requirements of IPCOP here

A Private Network configured in Hyper-V and an External Network (more on that here)

So, once you have done that you need to setup your Hyper-V guest.

Open up the Hyper-V manager, right click the name of your Hyper-V host, and click New, Virtual Machine.

The New Virtual Machine wizard will start.

If this is the first VM (Virtual Machine / Hyper-V Guest) you are creating, you may want to review this page, even if it isn’t it may be a reminder on some points, when your ready hit next.

So, we need to choose a name for our Guest, and choose the location to store it, if not the default.

When your ready hit next.

You will need to enter the amount of RAM you are giving the IPCOP system, my test box currently has 1gb (which i did to make the install a bit quicker, but i plan to run it on 512mb)

When your ready hit next.

IPCOP does not support the use of the Hyper-V synthetic network adapter (more on that here) so leave this set as ‘not connected’

When your ready hit next.

The next page will allow you to setup your VHD (Virtual Hard Disk) files. I am new to Hyper-V so i have tended to accept the defaults when setting things up, your choices here are quite simple – add a new disk, add an existing disk, or add a disk later.

I have chosen to add a new disk, and set it as 127gb in size. This is what is known as a Dynamically Expanding disk, (more on those here) you also can specify where to store the disk.

When your ready hit next.

Now you can choose the OS options, you can go ahead and tell it the location of the .iso file if you wish, choose install an operating system from a boot cd/dvd, choose image file and the option for iso will become active, and you can simply browse to the location of the file.

When you’re ready hit next.

Summary page – you can review the settings we have covered and hit finish when you’re happy.

Your machine will be created, and you will then see it listed as a VM in your Hyper-V manager console.

I have had to split this article into 3 parts due to Spaces blog entry size limits.

Part 2


Like Spinning plates…

Have to mention this, as i have been watching a lot of my favourite songs on YouTube, live versions always seem interesting to me whether i was in the audience to see them live or not.

Check out these gems:

Radiohead – Like Spinning Plates

Radiohead – True Love Waits

David Gilmour – Dark Globe

David Gilmour – Red Sky at Night

David Gilmour – Where we start

Hope you enjoy them.

So to other things, i have been meaning to pop on here to update a few things, interesting support incidents or just trivial details of my day to day life, but i just haven’t got around to it.

One thing i keep coming across is a mis-configuration, or lack of configuration of Exchange 2003, specifically to do with supporting mobile devices. iPhones are of course ever popular and gaining momentum on the famous blackberry, but do you really want to configure a pop3/smtp account on a device that is capable of so much more?

Please remember to install Exchange 2003 Service Pack 2, which opens the door to a whole new world for your mobile users.

Now my mind has emptied completely about what i was hoping to write about. Great.

Ahh yes, Rogue Anti Virus programs, a real pain in the ass. Found a good tool called rkill.exe on bleeping computer.com which will halt all malware running on your system, allowing you to download and install the anti malware of your choice, quite keen on Malware Bytes and Avira at the moment, both seem to do a sterling job of cleaning up the mess. Of course users will be completely unaware as to how such programs could have arrived on there pc in the first place… and we of course will just accept that.

Getting into Terminal Services at the moment, something i have so far not used in my professional capacity, and as luck would have it we have inherited one that is on a very very poor network indeed. So lots of scope to look good and improve things. More on this as i learn it..

HP Servers run much better with the Proliant Support Pack installed, just a general tip, but again one that seems to have escaped some admins out there… When will they learn eh?

Moving away from things IT related for a second, really enjoyed UP and Cloudy With a Chance of Meatballs recently, really good films, UP was just fantastic, hilarious and sad. I think Jonathan Ross summed it up nicely – I spent the first ten minutes sobbing uncontrollably, and the next hour and half laughing my head off. Meatballs was not as funny, but still a good enjoyable family film, with a great performance from Mr T. Sucka.

Had a little flutter on the football over the weekend, 21-1 on Wigan to win, and 6-1 on UTD to win the premier league. Only lost a fiver, but made it a little more interesting for me watching Wigan destroyed 8-0 by Chelski.

Esme is finally over her ‘reflux’ problem , which translated into laymen’s terms, means projectile vomiting anything she ate. So now we have a nice stained carpet.. but thankfully she is much better. I cant believe she is now 7 weeks old, and she really is the spitting image of her sister. She is just starting to smile and it is great to see her and Stella interacting, which so far consists of Stella shaking her hand and saying how do you do?

I will make an effort to update regularly so i don’t have to write these mammoth posts. Heard that before.. right.

And the conservatives said they would scrap the National Insurance tax… some things were just meant to be.