August 11, 2011
by Robert Pearman

The Windows 7 Professional Pack Add-in (Forever after called W7PP or Pro Pack) is a Free Add-in for SBS Essentials that Microsoft have developed and will be releasing on the 12th of August.
Whilst most Add-ins will work across the Suite of Colorado Products (SBS Essentials, WHS 2011 and Windows Storage Server 2008 R2 Essentials, try saying that after a few drinks) this one is specifically for SBS Essentials.
The Add-In simplifies configuration of Folder Redirection, Windows Firewall Settings and also Windows Update & Defender settings for client computers running Windows 7 Professional.
It does this by creating Group Policy Objects (GPO) by means of a Wizard, and targets Windows 7 Pro by means of a WMI filter, more on WMI Filters here.
Now, for the more experienced Administrator, that obviously means it is trivial to retarget these GPO’s to apply to any Domain Joined Client, however do keep in mind the Target Audience or market for SBS Essentials is that of the DIY’er Admin, someone who doesn’t know one end of a GPO from an OPG.
And just because we can doesn’t mean we should right? We’ve all seen Jurassic Park.
Anyway, i am going to cover the installation of the W7PP and detail the changes it makes, and what you can expect to see on your client machine, and also a little bit of troubleshooting as well.
Installing
Step One.
So, having downloaded your W7PP and extracted it, you will be presented with the setup file. The file is called, Win7ProAddIn.wssx (you may need to unhide known extensions to see the .wssx)

Step Two.
Double click the file to start the installation, and the first screen is the License Agreement.

Step Three.
The next page is a simple choice, Install the Add-in or Cancel.

Step Four.
Installation Progress..

Step Five.
And complete..

So let’s switch to the Dashboard now and see what has happened.
Go to the Add-ins tab, and you’ll see the W7PP. You can’t really do much here apart from Admire a job well done to get this installed. You can of course undo your handy work by uninstalling (remove) the add-in.

Since this is all about getting it working i am not covering the uninstall.
If we move along the tabs to the left, and go to Server Folders and Hard Drives, we can see no changes on this tab, no folders have been added.

Keep moving left, and onto the Computers and Backup tab.

On the right hand side we have a new option, Implement The Windows 7 Professional Pack.

Just installing this beast is not enough, we have to go all the way and IMPLEMENT!
So let’s click on the Implement W7PP link.
Implement
Step One.
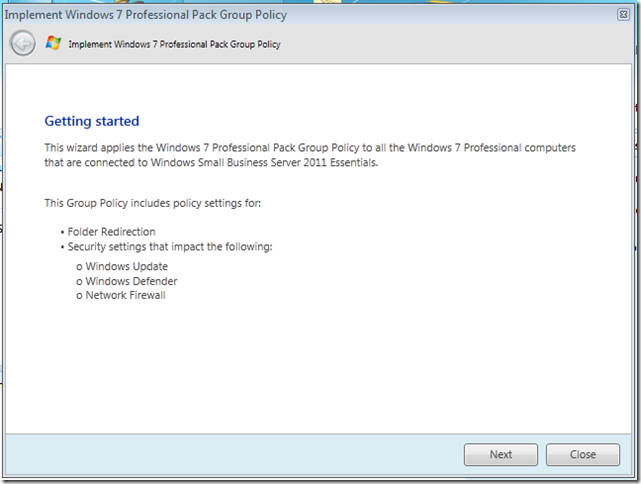
On the first page, we can read a little overview of what the implementation wizard will be doing. Click Next.
Step Two.
Enable Folder Redirection Group Policy. On this page we have the choice to choose whether to use Folder Redirection or not, and the choice of which folders to redirect. For example, you may not want to redirect someone’s My Music folder, and have 40gb worth of Abba tracks clogging up your new server. On the other hand you might like Abba, in that case its probably Ok. You can click to ‘Select All’ or cherry pick which ones you want to have redirected. Click Next When you are ready.
Folder Redirection allows a client computer to store data files and folders on a network share. The process is invisible to users. It is a way to make sure that all users documents and files are stored on the server, whether they save them to their ‘desktop’ folder or their ‘documents’ or in the company data share. It can also make it easier for users who move between computers, but when you don’t want the PITA that is Roaming Profiles.

Step Three.
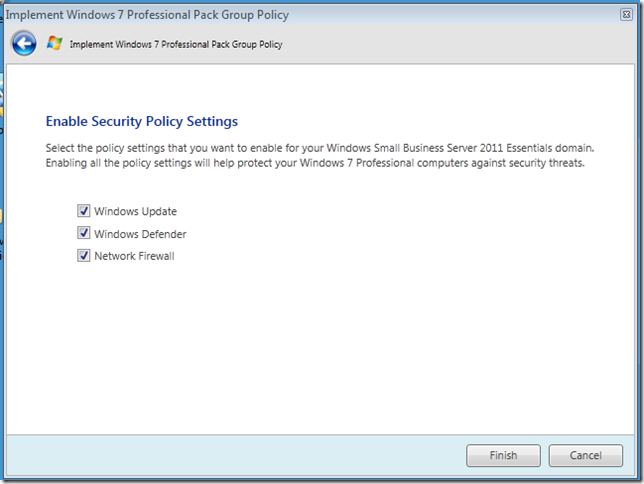
Enable Security Policy Settings. Here we can choose if we want to let the W7PP control our Windows Update, Firewall and Defender settings. The default is to have all 3 selected. Click Next when you are ready.
Step Four.
The wizard will now run through and setup your policies and also add the folder to host the redirected folders.

Step Five.
With any luck you will see a green tick. Green means good.

So, let’s go back to the Dashboard and back to the Server Folders and Hard Drives tab, we can see we now have a new Shared Folder created.

FolderRedirection, this shared is located in your D:\ drive, and as you will see in the troubleshooting later on, its quite picky about that D:\.
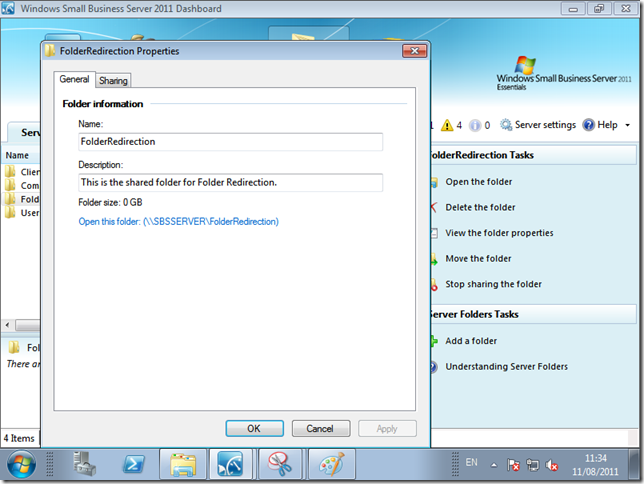
If we right click the folder, and go to ‘View the Folder Properties’ we can have a look at the default settings.

On the General Tab, we have the name and description fields, a size total for the folder and a link to open the folder itself.
On the Sharing tab we can see the level of access our Users have to this folder.

NB. Don’t me tempted to change this – all will become clear later on.
If we go to the Computers and Backup tab, we can now see that the status of the W7PP is now ‘implemented’

Now, let’s open up the Group Policy Management Console, and we can run through the settings created by the Pro Pack. (Click Start, Administrative Tools, then find Group Policy Management Console)

If you are not familiar with the GPMC or GPO’s in general, i would strongly advise you not to play around with it. Group Policy is extremely powerful and can be used to good effect to create safe, secure, computing environments.
It can also be used to lock yourself out of your own network if you click the wrong thing. Be Warned!
If you expand, Forest, Domains, and finally yourdomain.local you will see a Tree structure that Mirrors what you would see in Active Directory Users and Computers (ADUC) Only this time you can see the GPO’s applied in the tree.

All Domains have a Default Domain Policy, even if you are experienced with GPO’s my advice is not to change the Default Domain Policy at all if you can avoid it. So let’s ignore that.
You can see now we have 2 policies created by the Implementation Wizard.
W7PVP Folder Redirection
W7PVP Security Templates
No, i don’t know what the V in PVP stands for.
W7PVP Folder Redirection
Left click on on the Folder Redirection Policy, and the details pane on the left will change to show you more specific info on this policy.
Folder redirection is a really useful feature, and you can find out more from this TechNet page http://technet.microsoft.com/en-us/library/cc732275.aspx

This is a warning, telling you if you make changes to the GPO – they will affect anything the GPO is currently linked to. So be careful.
You can click OK here.

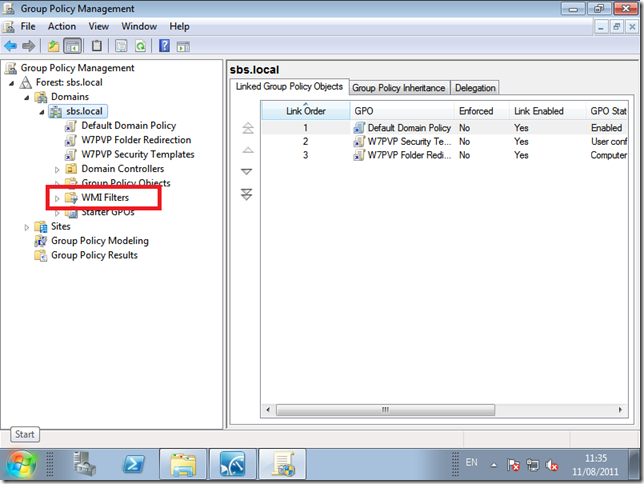
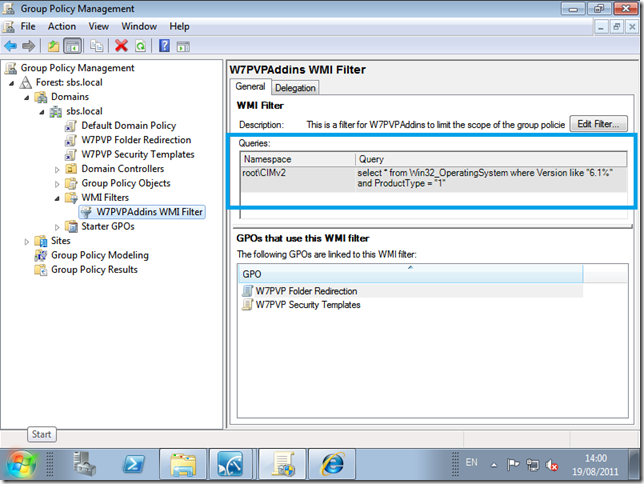
Under Links, you can see where the policy has been Linked, Under Security Filtering, you can see which Groups or Accounts the Policy will affect (apply to) and WMI Filtering shows if any WMI filters have been applied.
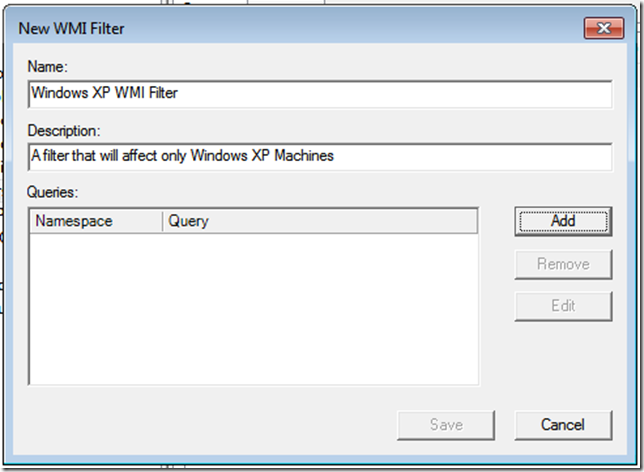
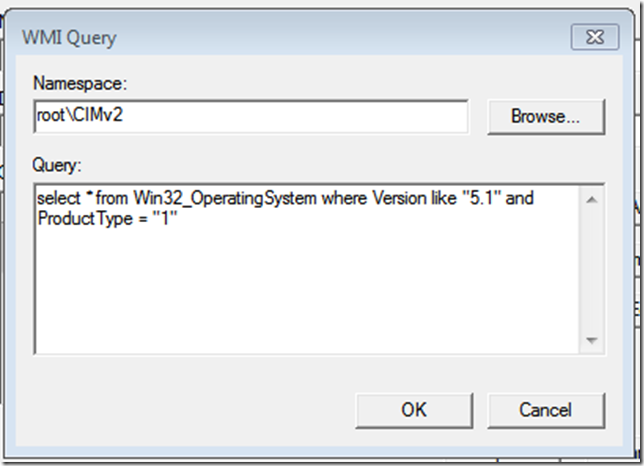
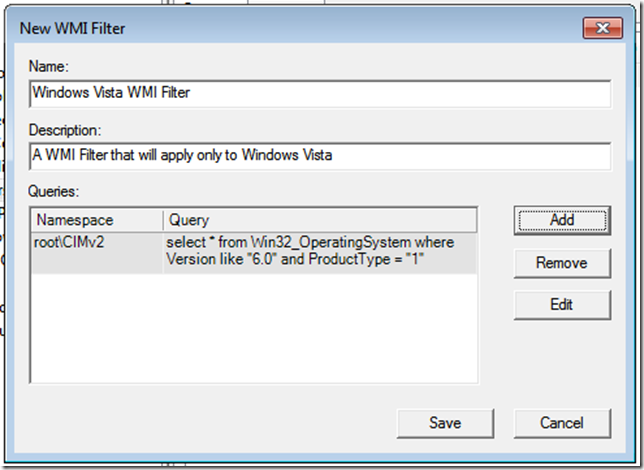
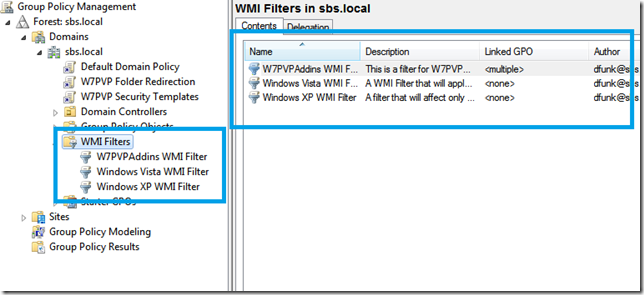
WMI Filters and GPO’s are really powerful.
For example, a normal GPO without a WMI Filter will apply to any object below where it has been linked.
That is generally a good thing, but, if we wanted to change a setting on only a particular . group of computers, lets say computers running Office 2010, or if computers have a hard drive of X GB’s then a WMI filter can do that for us.
When the policy is applied, WMI will query the computer for the settings defined in your Filter, and if it matches then the policy will be applied.
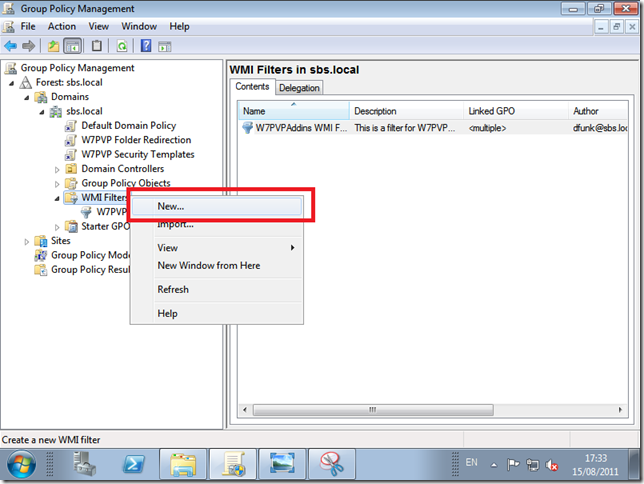
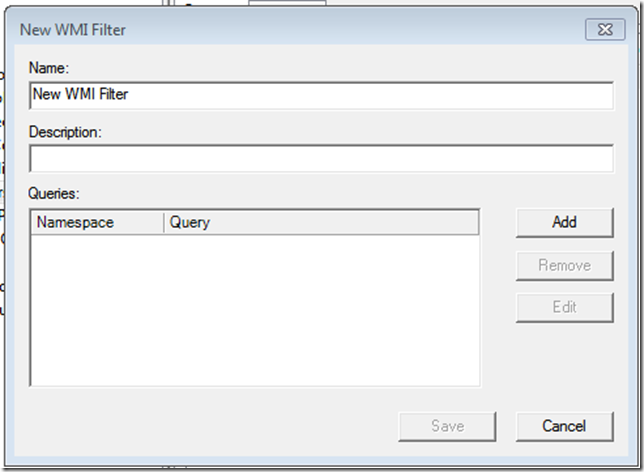
WMI in itself is a massive topic and way way way beyond what we are talking about here, and ill follow up with a separate post about the WMI Filter used with the W7PP.
So moving on, we will ignore the Details tab, as this just shows us some info you will not need to worry about, and also the Delegation tab is for advanced targeting and security settings, which you will not need to use.
The Settings tab is the main one, and this shows us which settings have been set, and what the values are.

As you can see, nothing has been defined under ‘Computer Configuration’.
GPO’s are split into two sections, Computer Configuration and User Configuration. Pretty self explanatory, but settings defined under Computer Configuration apply to a Computer. Settings for Users apply to Users, regardless of which computer in the domain the user logs into.
User configuration will usually override Computer Configuration, but again GPO’s are a massive subject so you can do more research on Group Policy here.
Under User Configuration, we can expand the settings by clicking ‘Show’
Drill down under Folder Redirection, and you can see each folder that can be configured.
Clicking on Show on any of these folders will display the settings that have been chosen.

Each Folders Settings are split in two, You have a Path setting, and then an Options setting.
The path will be set to go to the new Folder created earlier, which is \\servername\FolderRedirection
You will then see %USERNAME%\Folder
%username% is a path Variable, and this tells the Client machine to create a folder under the path, using the users username.
So for example, if i log on as Don Funk, with a user name, DonF then the path to my redirected App Data folder will be
\\servername\FolderRedirection\donf\appdata
- The options are quite straight forward.
- Grant the User Exclusive Access to the Folder – Means no one else can view this folder
- Move the Contents of the Folder – Means if you have an existing local folder, then its contents will be moved over to the server.
Also, Apply redirection Policy to Win 2000…. Means do we want to use this policy along with Older OS’s. There are several considerations to make when you use this setting, which are beyond this post because this Add-in is only for Windows 7! but you can find a great resource here.
Under Policy Removal, there are also some straight forward settings, for what to do when the policy is removed.
Do we want to Leave the contents of the folder in place, or move it back to the local computer.
All of your Redirected Folders will have the same settings by default, which are,
- Grant the User Exclusive Access
- Move the Contents
Restore Contents on Policy Removal
W7PVP Security Templates
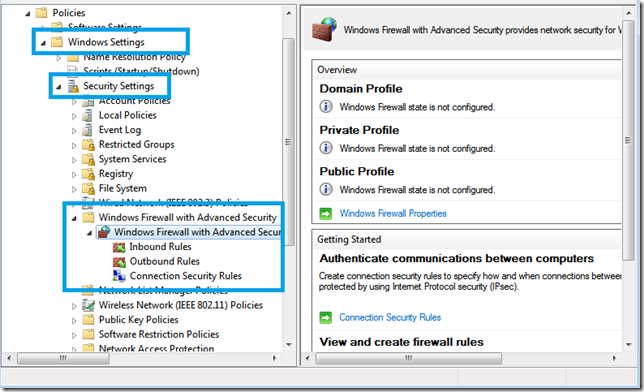
Moving straight on to the settings of this policy we can see we have settings defined under, Windows Settings, and Administrative Templates.

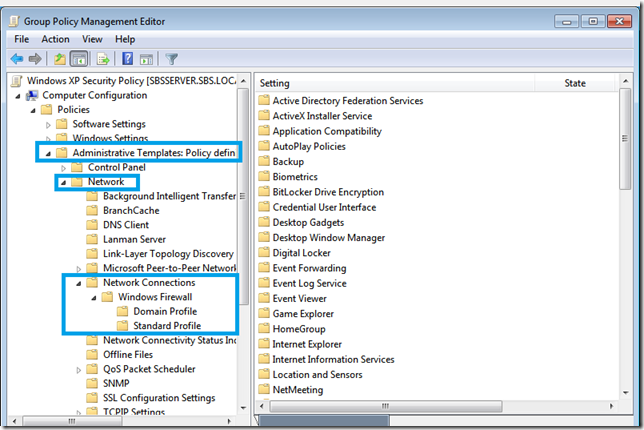
The Windows 7 Firewall settings are configured under ‘Windows Settings’ and ‘Administrative Templates’ and the Windows Update and Defender settings are just configured under Administrative Templates.
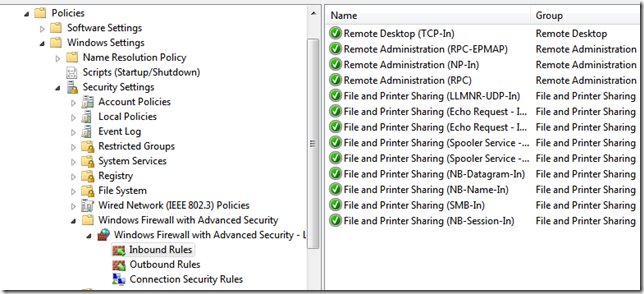
Windows Firewall with Advanced Security
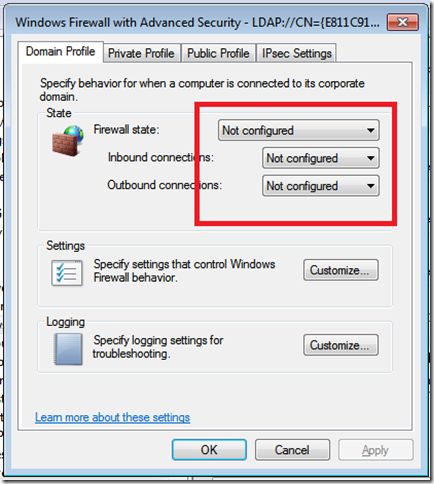
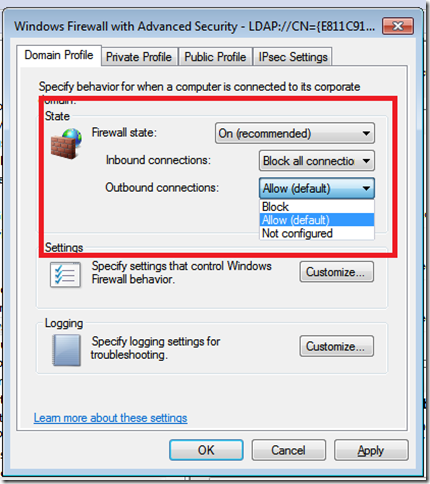
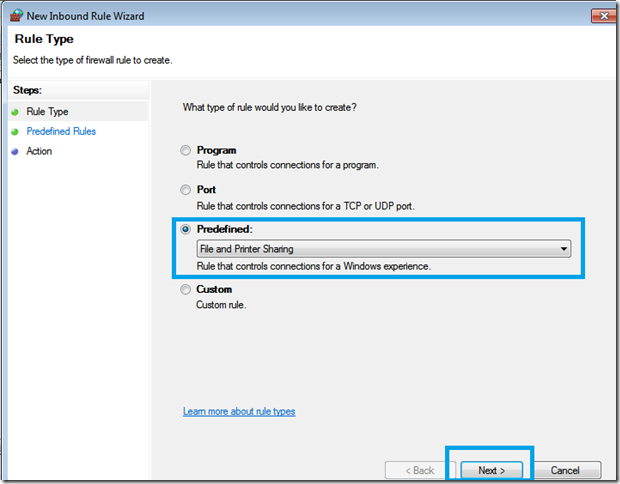
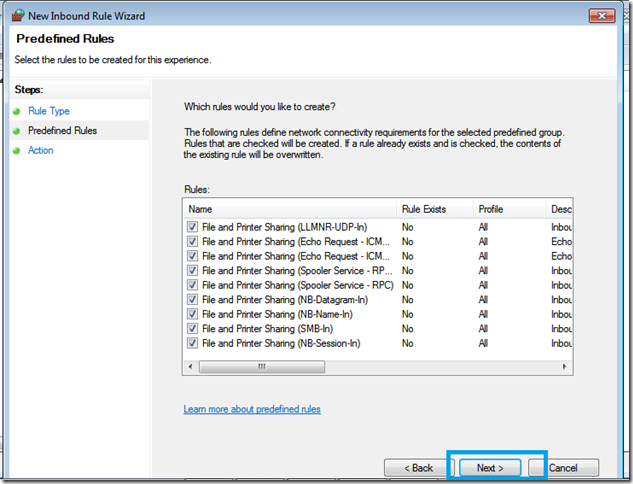
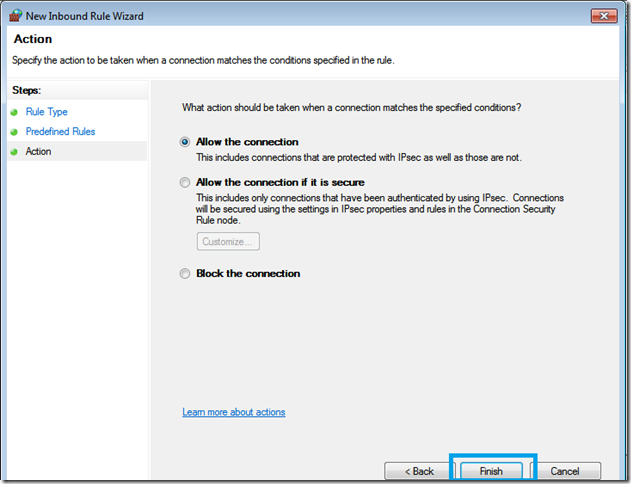
This Windows 7 Firewall is very powerful indeed, and can be configured in a very in depth manner. The W7PP does not go to such lengths and just applies some basic firewalling to the client computers. That is to say, it blocks all incoming traffic, and allows all outgoing traffic. It applies these settings on Domain, Private, and Public networks.
Whilst i am security conscious I’m a little concerned that blocking incoming traffic whilst on the domain network might lead to having more issues that it solves, especially if Admins or Users in a small office are used to Sharing desktop printers or folders on each others machines. You could argue that the SBS Server is there to take over… but i am expecting people to trip up on this one.

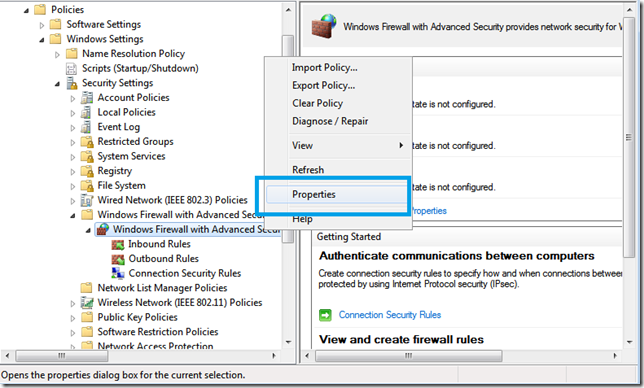
Anyway going back to the GPMC we can review the settings that are applied.
- Firewall State – On
- Inbound Connections – Block
- Outbound Connections – Allow Moving down to the Administrative Templates,
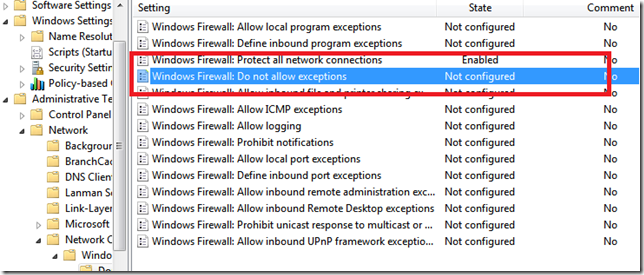
Moving down to the Administrative Templates:
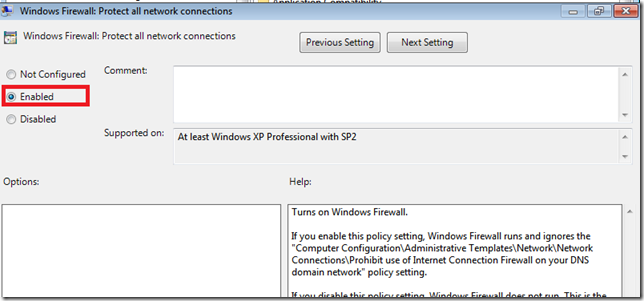
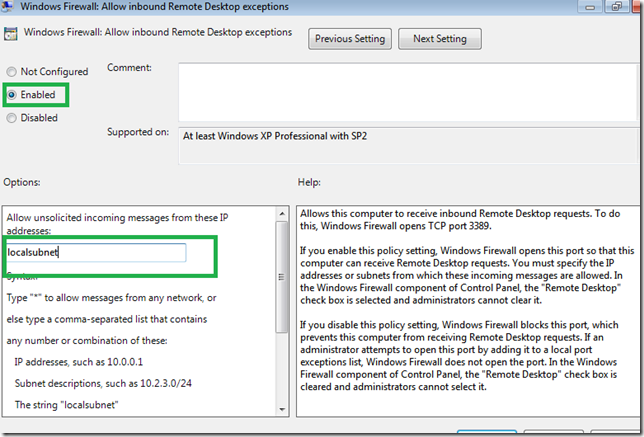
- Windows Firewall Protect All Network Connections – Enabled

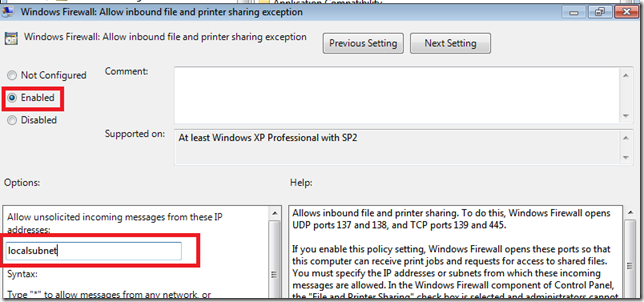
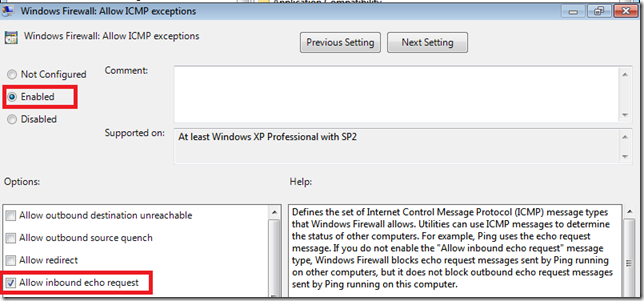
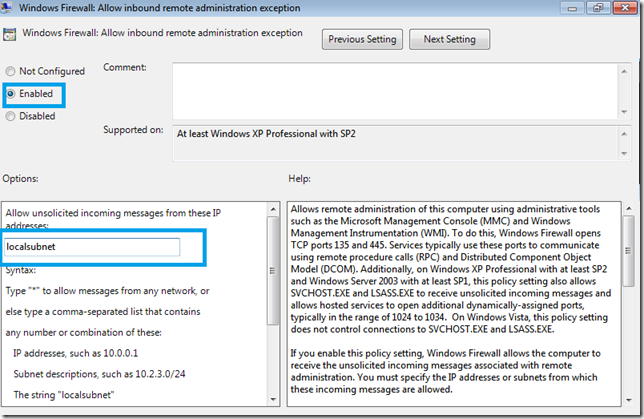
That is it for the Windows Firewall settings. As i said, very basic settings.
Windows Defender
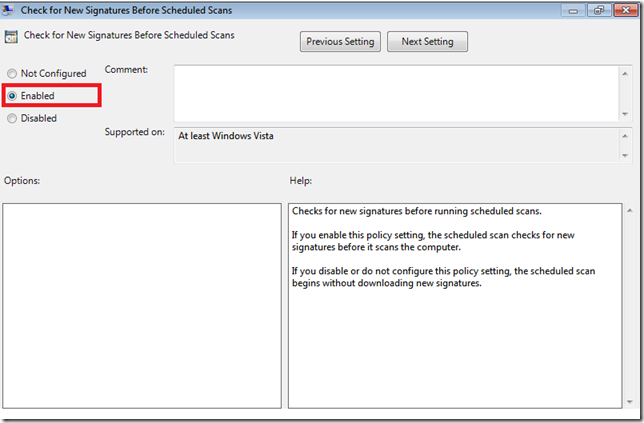
Windows Defender is also controlled by the W7PP. There are 8 Available GPO settings for Windows Defender, but the only setting defined by the W7PP is

- Check For New Signatures before Scheduled Scan This is fairly straight forward and, of course will force Windows Defender to check for updates prior to running a scan.
There are other settings available for use by GPO. I cannot find a definitive resource bearing the Microsoft logo though, so, you’re on your own for now!
Windows Update
Last but not least, Windows Update. Let’s run through which settings are being controlled:

- Allow Automatic Updates Immediate Installation
- Allow Non Administrators to receive notifications
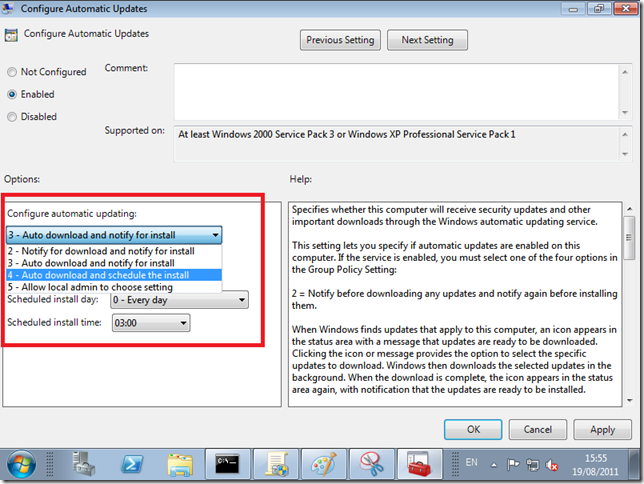
- Configure Automatic Updates
- Enable Windows Update Power Management
- Turn On Recommended Updates
Allow Automatic Updates immediate installation. This is a policy i always disable. It is enabled here by default, and this worries me slightly because an update that is downloaded that may not need to reboot will auto install. This could happen during the work day and i have seen it cause problems with clients. I have never used this setting since Windows XP days.
Allow Non Administrators to Receive Notifications. This will be the little prompt in the system tray that tells users Updates are ready. Personally i also do tend to turn this off, as prompts to users generally means questions, and we don’t like questions do we?
Configure Automatic Updates. This setting is configured with Option 4. Download and Schedule the Install, and the install time is scheduled for 3am. The first one i agree with 
Enable Windows Update Power Management. A brilliant feature brought in with Windows Vista, Gone are they days when you had to leave your computer running overnight so it would actually install the updates at 3am. Windows can now switch on the machine for you and install updates, and let power management put it back to sleep when it is finished.
Turn on Recommended updates. I don’t know what makes an update recommended as opposed to any other type. Suffice to say, by default, your going to get them.
You can find out more about controlling Windows Update behaviour through Group Policy here
So that pretty much covers the installation, implementation, and settings on the Pro Pack.
If we switch over to a Win7 Client PC now we can see some of the changes you will see on your machines.
Windows 7 Client Computer
Log on to your Windows 7 Machine, and launch an Elevated Command Prompt. (Right click CMD and click Run as Administrator)

If you are new to GPO’s then one command you really want to learn is GPRESULT. This will show us the status of Group Policy on our client computer.
So from our CMD prompt, run GPRESULT /R

Scrolling through the output, you will see, it is again split into Computer Settings and User Settings – almost like they knew we would be looking.

We can see some really useful information about the Client, the last time it applied Group Policy, and the Server (Domain Controller) it was applied from, the Site we are in and whether we are using a Roaming Profile. Some of this is only for larger networks however and not really important in an SBS Essentials network.
Moving down, we can see what policy is applied to our Computer, and which ones are filtered out.
The same is true for the currently logged on User.

We can see in this output the only policies that are being applied currently are the Default Domain Policy to the computer, and nothing to the user account.
Lets also look at the path to our My Documents folder, if we click on Start, the right click Documents, and click Properties.


We can see the path points to the local computer, c:\users\don
Now lets imagine we magically apply the W7PP, and reboot our PC.
The new GPO’s should be applied at start-up and logon (start-up for computer and logon for user)
You may notice your first logon after implementing the pack is longer than usual, that is because the computer is copying up the contents of your redirected folders at logon.
User wont know that though, they will just see a really slow logon.

Now, running another GPRESULT /R
We can now see that our W7PVP Policies are applied.


If we go back to look at the path of our My Documents folder, we can see that it now points to our FolderRedirection share on the server.

If we navigate to the shared folder we can see all of our redirected folders.

We can also just review the status of the Firewall, right click the network icon in the system tray, then go to Network and Sharing Center, in the bottom left, click Windows Firewall.

You can see a cream coloured bar saying that, For your security, Some Settings are managed by your System Administrator.
Troubleshooting
During the writing of this post i did come across a few issues.
Firstly, if you do not have a D:\ on your server and you choose to Redirect Folders, the implementation wizard will fail. You do not have the choice to move it to another drive, the wizard will just fail.

What to do if you have built your server with one big C drive?
I would hope that, you have some free space. So my advice today would be to create a VHD in Disk Management and Mount that as Drive D. You can find out how to do that from here (the link is for Windows 7 but the steps are the same)
NB. Do not use DISKPART unless you know what you are doing.
You might think that is a stroke of genius. You’re right. Unfortunately it doesn’t work.
Seemingly if you find yourself here you have strayed too far from the defaults and we know what means in SBS land.. you’re riding a segway on a cliff top, and we all know how that story ended right?

What does work however is Shrinking the C partition down and creating a new D partition in the free space. You can do this from Disk Management.
Whatever happens, You need a D and the only way it seems, to get the wizard to play nice is to get a D:\, from wherever you can!
Troubleshooting clients will be a little easier. First the basics, make sure your Server and Clients are in the same Time Zone (i assume they are physically, but logically, the computers clocks may be different)
Check your GPRESULT command, see what is and what is not applied.
Look in the event logs on the client PC, you will find most errors with GPO are usually something simple like NTFS or Share Permissions.

That links us in nicely with a little oddness from the Dashboard. If you remember earlier, we looked at our new FolderRedirection folder (on the Server Shares and Hard Drives tab)
It shows all our users had no access!
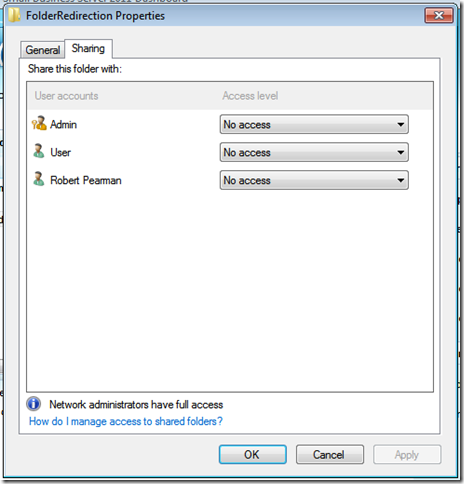
So how then, does Folder Redirection occur?
If we go into the Computer Management MSC console, we can look at the Share Permissions of the FolderRedirection folder. We can see here in the properties and on the Share Permissions tab, that Everyone has Full Control to the Share.

If we look at the Security tab at the NTFS permissions, we can see that Domain Users, have Read, Read & Execute and List folder Contents. We can also See a special permission is applied. That permission is create folders.

So, because our user has the Create Folder permission, we are allowed to create folders for Folder Redirection at logon. Then, because we created the folder, we are the owner, and the owner is granted Full Control of that folder by default.
But why does it show ‘No Access’ in the Dashboard? Good Question.
The answer is, i don’t know. What i can tell you is that on the other default shares, the user access settings result in an entry in the Access Control List on that folders security tab,
We don’t want that on the FolderRedirection folder as that potentially will grant access to other users folders once they have been redirected.
I hope you have enjoyed this run through the W7PP, please form an orderly queue at the download center.
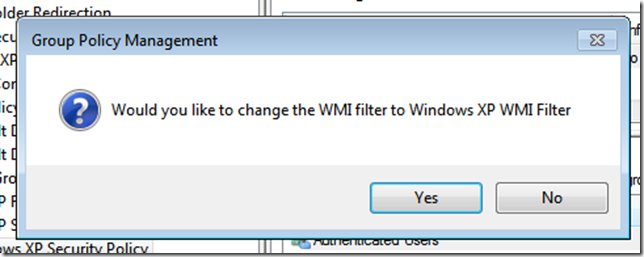
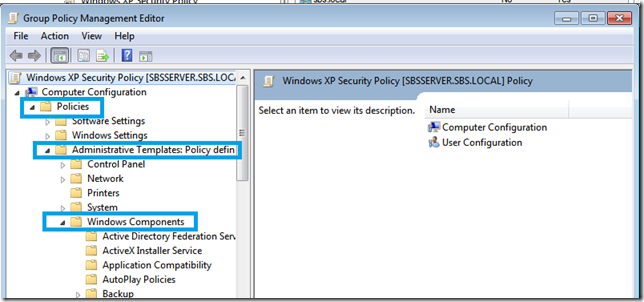
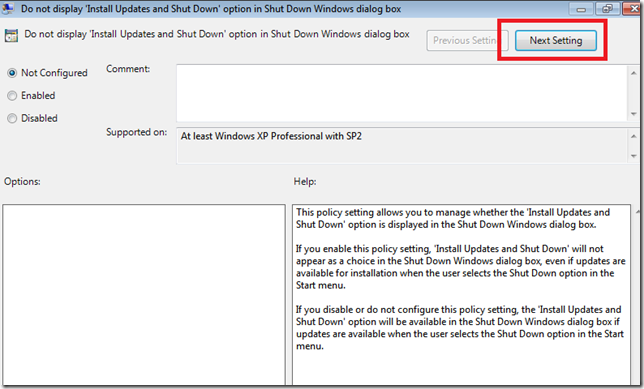
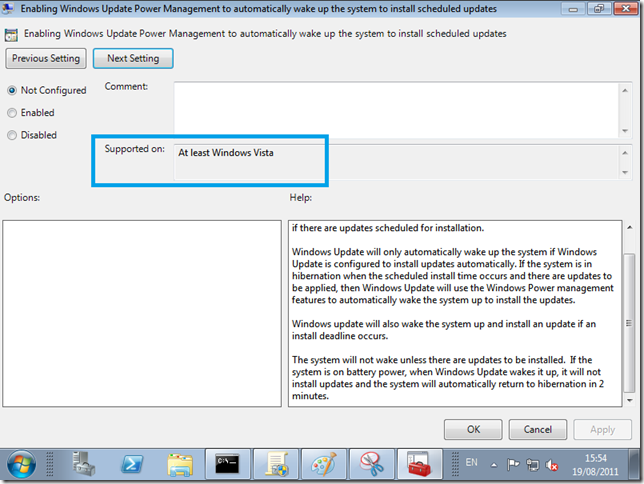
In this follow up post i talk about how to use GPO and WMI on Windows XP and Windows Vista to get similar functionality.
http://titlerequired.com/2011/08/19/wmi-filters-windows-7-professional-pack-sbs-essentials/
 Nice title for a post, hopefully the SEO on that one will kick in.

