MDT 2013 Windows 10 and the MSP Part 2
March 1, 2017 Leave a comment
 In part 1 we looked at installing our MDT Server. In Part 2 we will look at some initial configuration of MDT.
The first time you open the Deployment Workbench you will want to create a Deployment Share.
A deployment share is the resource that holds all of your MDT Data, including Operating System Images, Applications, Drivers and Patches.
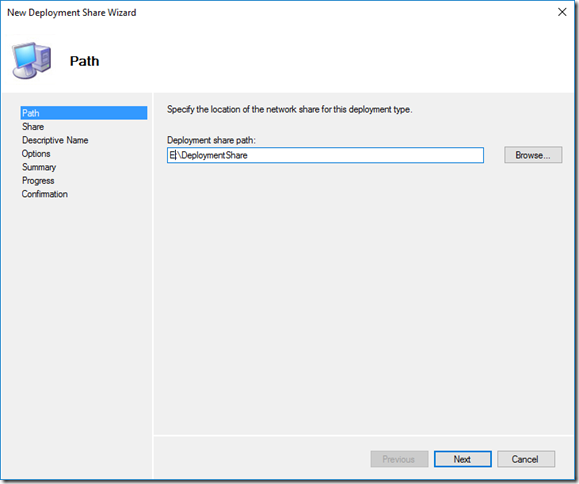
Right click on ‘Deployment Shares’ and click new Deployment Share. Enter a path for the share and click on Next.
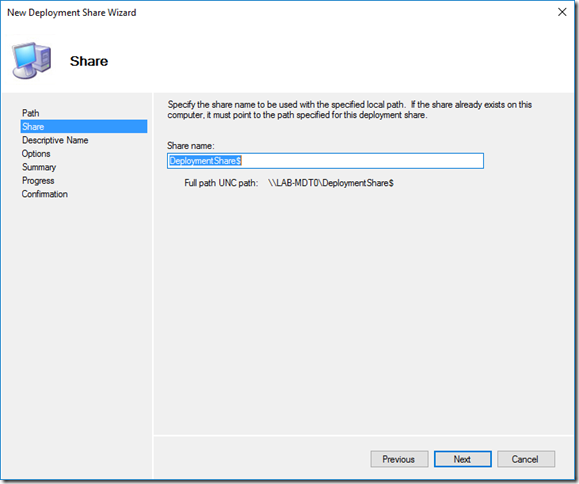
Keep the default name for the deployment share, and click on Next.
Enter a description if you want to, click next.
On this page you will need to chose some options. You can customise these later if you want to so feel free to accept the defaults, or change the selections. Click on Next when ready.
Review your summary and click on next, then Finish.
If you expand your deployment share, you will see all the various sections you have.
Before we dive into Adding custom images and applications, lets setup a few extra settings.
Right click your deployment share, and go to properties.
Click on Rules.
This section is also known as ‘CustomSettings.ini’ and it can be used to define the behaviour of your MDT Deployment.
This section can be used to do some very cool stuff indeed, but for now we just want to add one line under [Default] which is our organisation name.
You can use a’ as a comment denominator in this section.
' Name MDT
_SMSTSOrgName=Title Required LAB
If you click on Edit BootStrap.ini a new Notepad window will open.
This section is quite basic and is used for specifying some low level options for your MDT Clients.
I am entering KeyboardLocale settings, as well as credentials for a user who is authorised to access MDT so a client is not prompted to login to MDT when booting from PXE, of course you can change that to suit your environment. These credentials are stored in plain text, please consider that before you proceed.
You can also choose to skip the welcome screen.
DeployRoot=\\lab-mdt0\DeploymentShare$
UserID=robAdmin
UserDomain=sbs.local
UserPassword=afielfj0837209r3209...!!
KeyboardLocale=en-GB
SkipBDDWelcome=YES
Save the notepad file, close it down and click apply. You will be returned back to the main MDT window.
Now lets import an operating system.
Operating Systems
For the project that started this blog series off, I had an OS DVD from HP that had Windows 10 on it.
Right click on Operating Systems, and chose Import Operating System.
In the wizard, I am choosing a ‘Full Set of Source Files’, then I need to provide the path, whether that is a DVD drive or a copy of a Windows DVD in a folder.
On my E drive I have taken a backup of my HP DVD to a folder, oddly enough named ‘HP DVD’.
I am choosing to move the files to the deployment share, but this may not suit your environment.
You will need to enter a Destination Directory Name, this should auto populate from the Operating System you are importing, but you can make it more specific if you want to.
The summary page confirms your actions. Click next to complete the import.
Under Operating Systems you will now see the imported OS. The columns will show you useful info like the build number (great for Windows 10) and also the SKU (Flags).
Now, lets say I had another project but this time it was using Dell PCs. I have a Dell OS DVD, and I can follow the same procedure to import the OS and end up with a fairly similar Operating System Name.
However, I can also add a folder structure to this Operating Systems section.
The more organised you can make this, the easier you will find things later on.
Right click on Operating Systems and click new Folder.
I don’t know how to recommend you organise this, if you want to do it by Operating System, then Manufacturer. Or Manufacturer, then Operating System, then Build Number. You will have to figure that out for yourself.
Moving on, we can look at Out-of-box-Drivers.
Drivers
Both HP and Dell offer driver cabs for a lot of their computer models. These are really very useful as they contain all the drivers for each bit of hardware on your machines.
Again inside the Out-of-box-drivers section you can organise your drivers into devices or groups, however you choose to do so.
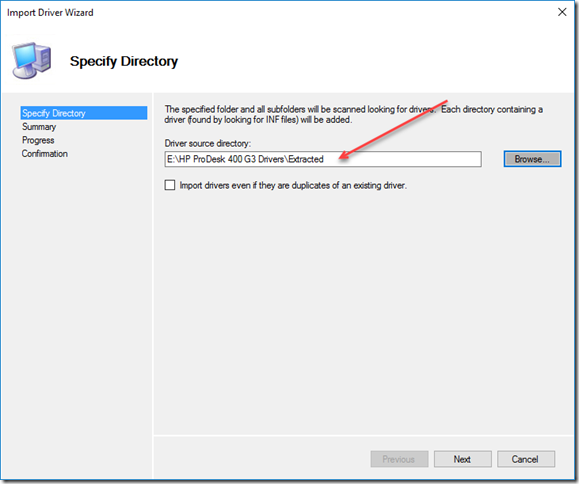
On my project I am setting up an HP ProDesk 400 G3, but HP did not offer a driver cab for this model. So I went to the drivers section of the HP Support site, and painstakingly downloaded every driver available.
These were all in exe files, so I extracted them out using 7Zip.
Import the drivers for your device using the Import Drivers wizard, by right clicking the Out-of-box-drivers folder.
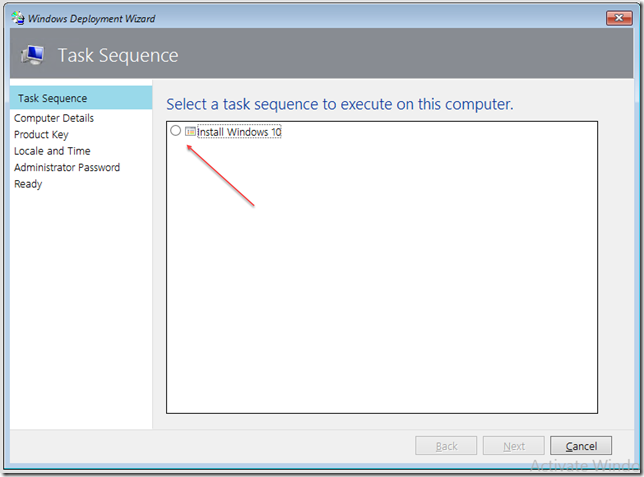
Next we need a Task Sequence. As the name suggests, this is a sequence that MDT will carry out on your devices.
Task Sequences
There are a number of different types of Task Sequence including ‘Sysprep and Capture’, ‘Standard Client Upgrade Task Sequence’ and ‘Post OS Installation Task Sequence’.
We are going to use a Standard Task Sequence in this example.
Right click Task Sequences, click new Task Sequence.
You need to enter a Task Sequence ID, Name and if you want to, a description.
Choose Standard Task Sequence.
Choose the Operating System you want to deploy. (see how the organisation pays off)
Choose to enter a product key or not, I always choose to not do that.
Enter some Organisational info and a default home page.
Enter a Local Administrator Password.
Review your summary and click finish.
Next we need to update our Deployment Share, and Create our Bootable Media.
Update Deployment Share
Right click your Deployment Share and Click Update Deployment Share.
Chose to Completely regenerate the boot images.
Click next on the summary and the Boot images will be created. What is good about this process is it automatically includes all Network and Storage drivers you have imported into MDT, so that any client booting this image will have access to the disk and network!
Once the boot images are created, we can add them to WDS. This will enable our new computers to PXE boot into MDT and launch our task sequence.
Open an Elevated PowerShell window.
Import-WdsBootImage -Path "E:\DeploymentShare\Boot\LiteTouchPE_x64.wim" -NewImageName "Title Required MDT (x64)" -NewDescription "Choose this image to boot x64 Clients to MDT" -displayOrder 1
I would save this command into a PS1 file, so you can run it again in future without looking up the command and add another line to first remove the existing Boot Image.
Remove-WdsBootImage -ImageName "Title Required MDT (x64)" -Architecture x64 -FileName LiteTouchPE_x64.wim
Finally we need to update some of the Deployment Share scripts to resolve some bugs with MDT. The solutions to which were very kindly posted here.
Open up your favourite text editor, and then find this file. E:\DeploymentShare\Scripts\ZTIUtility.vbs
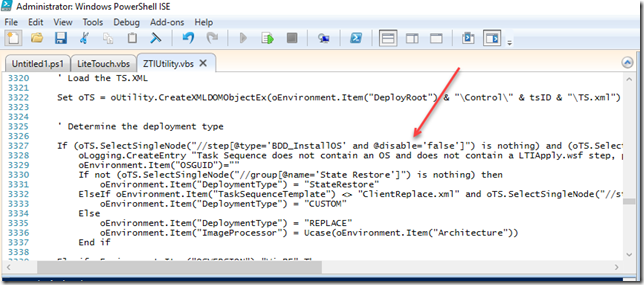
Find line 3327.
If (oTS.SelectSingleNode("//step[@type='BDD_InstallOS']") is nothing) and (oTS.SelectSingleNode("//step[@type='BDD_UpgradeOS']") is nothing) then
Change it to the following:
If (oTS.SelectSingleNode("//step[@type='BDD_InstallOS' and @disable='false']") is nothing) and (oTS.SelectSingleNode("//step[@type='BDD_UpgradeOS' and @disable='false']") is nothing) then
Save and close. Next open up DeployWiz_ProductKeyVista.vbs
Change Line 51 from:
if oProperties("DeploymentType") = "UPGRADE" then
To:
if Property("DeploymentType") = "UPGRADE" then
Save and close.
We now have a working WDS/MDT Deployment that will allow a PXE client to install Windows 10. In Part 3 we will look at more advanced configuration of MDT.
