Quick Fix – Exchange Server Version?

Just noticed a new KB pop up on the RSS Feed – here

(How to determine the version number, the build number, and the service pack level of Exchange Server)

Bit of a mouthfull!

Anyway, the powershell command they suggest is pretty basic and does not give us a real friendly out put..

Get-ExchangeServer

1

I much prefer this command that i snagged from this guys blog

Get-ExchangeServer | fl name,edition,admindisplayversion

2

Much cleaner results – and you can actually see the important info!

Update 25/10/2011

Try this command instead:

get-exchangeserver | select-object Name, ExchangeVersion, Admindisplayversion, serverrole, edition | fl

You can then match the ‘Exchange Version’ using this wiki post and find out how up to date you are.


Quick Fix : Internet explorer cannot display the Webpage SBS 2011 RWA (RWW)

(I did screen shot this post but for some reason when i posted they got all jumbled, and the formatting was messed up! so enjoy the plain text, 56k dialup version)

I have my lab server situated at home, but from time to time a question crops up during the working day that requires me to login to my lab setup and look things up.

As part of my lab setup i have SBS 2011 Standard running, but curiously i have been unable to access this from my work PC using IE and RWA(RWW).

If i RDP to the host Hyper-V box, it works perfectly. If i attempt to go to the external IP of the router at home in IE, it works perfectly.

If i use Firefox to go to the RWA page, it works perfectly, i just get a blank response from IE.

The question is, what could be causing it? Skip to Solution?

First, i am trying the obvious things, Resetting IE to defaults, restoring advanced settings.

What i find interesting here, is that IE is seemingly not even attempting to connect to the page – if you hit F5 to refresh the page it is instantly coming back with the failure.

I am now going to switch to WireShark to see if i can see anything happening on that level. For those of you who don’t know – Wireshark is a protocol analyser, and allows you to see in real time the traffic going across ‘the wire’, of your LAN connections. You can download it for free from here: http://www.wireshark.org/

There are tutorials and help files, and if you haven’t used the program before it can be a bit overwhelming to see the packet captures whizzing past.. so i would recommend you run through those before you start using the program.

I know what i want to find out here, so, i can go straight to inputting a capture filter, to only show me traffic destined for my SBS 2011 server.

The filters can be quite tricky, but to only display traffic destined for one IP enter – ‘ip.addr == <ip address>’

You will then need to go into ‘Interfaces’, (click Capture, then Interfaces) to select which Interface you want to monitor (Click Start, next to the interface you want to monitor)

Once you have clicked start, you will see a blank screen, because there is no traffic flow to that destination IP. To test your filter, you may want to PING that IP address to verify the capture shows those packets.

Now, lets try to gain access to our RWA site.

I see nothing in my packet capture.. (only my ping responses)

It seems as though IE has cached some bad response, or unavailability of the service, and is refusing to attempt a connection.. Very Odd.

Just to confirm that or packet capture would actually pick up an RWA access attempt, switching back to Firefox i refresh my page..

Lots of info flows past – so we are definitely seeing a connection attempt from FF. Still – why nothing from IE?

So, i decided to reinstall IE on my computer.

Just a note for those of you running Win7 (i am running Win7 x64) IE8 ships installed on Win7, so you cannot download it!

To reinstall you must go to Control Panel, then Programs and Features. Choose to ‘Turn Windows Features On or Off’ then find IE8 in the list and uncheck it. Reboot, and then Check it to kick off the reinstall.

After a reinstall i was quietly confident this would solve the issue. Unfortunately not.#

At this point i was beginning to run out of ideas.

I decided to turn to some of my online friends for some pointers. Enter Tim Barrett.

Tim offered to connect up to my pc so we could both play around with settings to see if we could solve the issue.

We went through several things, including adding an entry to the hosts file, resetting IE (including using the clear personal settings option), we ran IE with and without Add-ons, and we ran it in both x64 and x86 (32bit) mode.

Nothing worked, and what was stumping us was the lack of activity in WireShark.

We then loaded up Windows XP Mode on my PC and confirmed that it was working correctly.

It was and i could access RWA perfectly well through XP Mode

Solution

Tim began searching online, and turned up a post from Experts Exchange that mentioned if you were using a Self Signed Certificate to make sure it was installed correctly and that eventually lead us to the solution.

I was indeed using a self signed certificate on my SBS box. But that shouldn’t stop me visiting the site, right?

Well as it turns out, it was.

I got the root CA certificate exported into .cer format and onto my machine, and installed it. As soon as i did this i was able to load RWA in IE. I removed the certificate again to test, and sure enough my access was once again failing.

So, to install the certificate..

Firstly you will need your SBS Server CA certificate.  This can be distributed in a number of different ways.

On my network i have a share where the certificate resides. This is accessible via RWA – so via Firefox i could download this to the pc. Other methods would be through email, or pen drive transfer.

Once you have the file on your computer, open an MMC.

Click Start, then type MMC in the search box.

Click on MMC, then accept the UAC prompt.

Click File, then Add/remove snapin.

Find Certificates in the list of snapins, and click Add.

In the next box select ‘Computer Account’ and click OK.

Click OK to accept the default ‘Local Computer’

Click Ok to close the ‘Add Snapin’ Dialogue.

Now, expand ‘Trusted Root Certificate Authorities’

Expand ‘Certificates’ and right click, then click All Tasks, and then Import..

Follow the import certificate wizard, find your .CER file and continue to import it. When you have finished you will see a successful import message.

Now test your RWA access and you should find you can now connect!

Exporting Mailboxes to PST (ExMerge) on SBS 2011 – Scheduled Task Part 2

Now that we have worked out our syntax for our powershell scripts, we need to add them to some scheduled tasks to run them out of normal business hours – or just to automate them so you don’t have to do it manually.

In Part 1 we covered which commands we are going to run if you missed that, you can find it here.

You will need to have these commands saved as powershell scripts, (.ps1 files) you can do that by simply putting the syntax into notepad and saving the file with the .ps1 extension.

The 3 scripts are:

$Export = get-mailbox; $Export|%{$_|New-MailboxExportRequest -FilePath \\localhost\PST\$($_.alias).pst} |select-object filepath, sourcedatabase, mailbox, status | format-list| out-file c:\users\admin\mailbox-export-log.log

get-mailboxexportrequest | select-object filepath, sourcedatabase, mailbox, status | fl |  out-file c:\users\admin\mailbox-export-result-log.log

get-mailboxrequest -status completed | remove-mailboxrequest -confirm:$all

get-mailboxexportrequest -status completed | remove-mailboxexportrequest -confirm:$all

To add them to a scheduled task is slightly different than running your average batch file, it even has a little more complexity than running a normal powershell script, because for exchange cmdlets to run, you have to load the exchange powershell snapin as part of your scheduled task.

You can find a lot of useful info out on the net, some of the most useful posts i found are linked at the end of this article.

Firstly you will want to add a new scheduled task,  if you go to Start > All Programs > Accessories > System Tools > Task Scheduler

On the top right, you can click ‘Create Task’

9

You will need to enter a name for the task, i would also suggest enter in some details here to document what the task does. You will also need to click, ‘Run Whether user is logged on or not’ and ‘Run with Highest Privileges’

10

Switch to the ‘Triggers’ tab, and click on New. Here you can define the schedule that the task will run to, i would suggest you gauge the length of time the task takes to run, so you know how much time you need to run the task to minimise any disruption or performance issues.

13

Click on OK. You can see your trigger defined. Now click on the ‘Actions’ tab and click ‘New’.

15

In the program/script field enter the following:

PowerShell.exe -command ". ‘c:\Program Files\Microsoft\Exchange Server\V14\bin\RemoteExchange.ps1’; Connect-ExchangeServer -auto; & C:\users\dfunk\documents\scripts\export-all-mailboxes.ps1"

This breaks down to the following (based on my interpretation)

PowerShell.exe (runs powershell)

-command ". ‘c:\Program Files\Microsoft\Exchange Server\V14\bin\RemoteExchange.ps1’;

(launches the exchange shell component)

Connect-ExchangeServer -auto; (connects to the exchange server)

& C:\users\dfunk\documents\scripts\export-all-mailboxes.ps1" (executes our script)

25

Click on OK to save this syntax.

26

You are prompted because the task scheduler detects arguments to run with your command, click yes here.

Click on New again, to add a second action, which is to send an email.

Choose ‘Send an e-mail’ from the dropdown menu.

Fill out the details that are relevant to your environment.

27

Click on OK, and then click on OK again to save your task.

You will be prompted for your password as we are allowing this task to run if a user is logged on or not.

21

Enter your password and click ok, and you be returned to the task scheduler. You will see your new task added.

Right click the task, and choose ‘Run’ to test your task.

If you click on your task, and go to the History tab, you will see the status of your task as it runs…

28

You can see both actions have completed.

Now, let’s check we have a log file created..

29

And we should also have an email…

30

Not a particularly inspiring email it has to be said, but it does tell us that our task has kicked off.

Now, we can add a second scheduled task to run our second powershell script. This script will be almost identical but we will be running our powershell script to check on the status of the exports.

With this task you can also add an attachment to the email action, which is the output log file of the powershell script.

get-mailboxexportrequest | select-object filepath, sourcedatabase, mailbox, status | fl |  out-file c:\users\admin\mailbox-export-result-log.log

This command will output the status of the exports to the c:\users\admin\mailbox-export-result-log.log.

Depending on the length of time it takes for the script to execute you may need to separate the ’email log action’ into a third task, so you actually capture the log file after the export results are complete. Otherwise the log file may show that the mailboxes are either ‘queued’ or ‘in progress’

31

Your email should look something like this..

32

Now, the final task to add, is our final script.

get-mailboxrequest -status completed | remove-mailboxrequest -confirm:$all

get-mailboxexportrequest -status completed | remove-mailboxexportrequest -confirm:$all

This should be run as the final script, after your results email has arrived to clear the logs for the next time the tasks are run.

I used the following links to pull this info together as well as the built-in powershell help.

http://technet.microsoft.com/en-us/library/bb123798.aspx

http://www.mikepfeiffer.net/2010/02/creating-scheduled-tasks-for-exchange-2010-powershell-scripts/

http://computerperformance.co.uk/powershell/powershell_format_list.htm

http://blogs.technet.com/b/sbs/archive/2011/05/09/how-to-import-and-export-mailboxes-using-pst-files-in-sbs-2011-standard.aspx

Updated 10/2/2012 Fixed Syntax for Export Request

Exporting Mailboxes to PST (ExMerge) on SBS 2011 – Scheduled Task Part 1

So it looks like Wayne and Gagan beat me to posting the steps to exporting mailboxes out to PST files, the same functionality we used ExMerge for in the 2003 era, however something they didn’t publish was how to schedule it.

So before they do, i thought i would have a go.

Firstly to make it quicker for me to publish and increase the likelihood of beating them to it, i will assume you have read their awesome guide here..

So following on from them, let’s assume you want to schedule this to run each night, or weekly as a compliment to your already ‘robust’ backup routine, which i am sure is the corner stone of your foolproof disaster recovery plan.

You do have a plan don’t you?

Let’s examine the commands we need to run.

$Export = get-mailbox; $Export|%{$_|New-MailboxExportRequest -FilePath \\localhost\PST\$($_.alias).pst}

This command will execute to export all mailboxes on the server, and save them to a share called PST, inside which the mailboxes will be named alias.pst, from the screen shot below you can see my 3 mailboxes..

1

Now we are going to be scheduling this, so we wont be running it interactively, but we will want a log of what has occurred right?

so let’s append some text to our powershell command..

$Export = get-mailbox; $Export|%{$_|New-MailboxExportRequest -FilePath \\localhost\PST\$($_.alias).pst} | out-file c:\users\admin\mailbox-export-log.log

2

After a few seconds we are returned to a prompt..

Let’s open up the resulting file and see what we have got.

3

The resulting output is not really very friendly for a log file – yes we can see the exports are queued and we dont have any errors but it might be better if we could format the output a little neater.

If we change the syntax again slightly to include ‘format-list’ (fl for short) the output changes greatly.

$Export = get-mailbox; $Export|%{$_|New-MailboxExportRequest -FilePath \\localhost\PST\$($_.alias).pst} | format-list | out-file c:\users\admin\mailbox-export-log.log

4

Now this is probably too much information to review for a log file, so we now might want to narrow down what we are going to report.

Let’s now add some more syntax to our command, this goes in before we put the ‘format-list’ command or Fl for short.

$Export = get-mailbox; $Export|%{$_|New-MailboxExportRequest -FilePath \\localhost\PST\$($_.alias).pst} | select-object filepath, sourcedatabase, mailbox, status | format-list | out-file c:\users\admin\mailbox-export-log.log

5

This is much more manageable – we can see the path to the exported PST, we can see the source database (if we need it, if you are running more than one database) the actual mailbox and the request’s status.

You can choose which fields to include by looking in the left hand collum in the screen shots above to find the correct property name, then just include them in the syntax, for example to add the request guid and request name…

select-object filepath, sourcedatabase, mailbox, status, request guid, name  |

What we can do now is run a second command to pull our results into a second log file.

get-mailboxexportrequest | select-object filepath, sourcedatabase, mailbox, status | fl |  out-file c:\users\admin\mailbox-export-result-log.log

6

Hmm hold on – this is showing me EVERY mailbox export request ever. This is not ideal because our log file is going to be huge.

So what can we do?

As written in Wayne and Gagan’s article we can run this command to clean things up..

Get-MailboxExportRequest -Status Completed | Remove-MailboxExportRequest

7

If i press A to get rid of all the reports i am sent back to a PS prompt.

Now if i run my report again, i should get an empty log, because there are no mailbox export requests left on the system.

get-mailboxexportrequest | select-object filepath, sourcedatabase, mailbox, status | fl |  out-file c:\users\admin\mailbox-export-result-log.log

8

So, the next time we run our export this log will be populated only with those particular export statistics, and in turn can be cleaned out by running the remove command.

In the next part of this article i will show you how to turn this into a scheduled task.

Part 2

Virtualising your server for Migration Preparation

With Virtualisation technology and programs becoming increasingly popular, it makes sense to look at Virtualising your server prior to a major upgrade or migration, keeping the source server as a fully reliable backup/roll back.

Using tools like Shadow Protect, you can very quickly take a running server, and turn it into a bootable virtual machine.

The drawback is it is an expensive product, and, for some smaller consultancy’s it may be a ‘nice to have’ but not something that is looked at as a serious option when preparing to migrate a client.

Hopefully we can change that idea.

Using the Sysinternals tool, disk2VHD, we can take our running system and create a VHD from it. Using this VHD and Microsoft’s Free Hyper-V Server, we can build a VM from that VHD and using this we can begin to prepare our migration or upgrade.)

So, to follow me through this article you will need…

  • A source server ( i am running SBS 2003 R2 Standard)
  • Some available hardware to host your virtual server (ideally with at least the same amount of ram as your physical server, but remember your server needs to have hardware that supports hyper-v)
  • The Sysinternals disk2VHD tool
  • USB/eSata Storage to transfer VHD (or local network access to the source server)
  • Microsoft’s free Hyper-V server (this is the pre SP1 version)(1.5gb)
  • Hyper-V Management Tools (Install the update, then use ‘turn windows features on or off’ to activate) (240mb)

Considerations: Make sure your source server is correctly licensed to allow for virtualisation, Keep in mind technically you are moving the server to new hardware, so a typical OEM license would not cover you for this. That being said, I’m sure we can all use our common sense on the licensing front!

Can i just REITERATE – if you are running an OEM install of SBS 2003 (or any OS) it is highly likely your server will require activation when it boots on the virtual hardware. Reactivation will be at Microsoft’s discretion and i can make no guarantees or whatever :p

Also as we are on new hardware, we will need to follow procedures for your particular OS to change NICs.

This article is split into 10 steps…

Step One – disk2VHD

Step Two – Install Hyper-V Server

Step Three – Initial Hyper-V Configuration

Step Four – Hyper-V Network Configuration

Step Five – Connect to Hyper-V Server

Step Six – Configure your VM

Step Seven -VM Network Configuration

Step Eight – Power Up your VM!

Step Nine – Testing your VM

Step Ten- Back to the Future!!

Step One. disk2VHD

So first of all we will run our disk2VHD tool on our source server,  the size of your servers disk drive(s) will determine the time it takes for the VHD to be built, luckily on my source server i only have a single C: drive, and the used space is quite low.

1

Under VHD File name, you can choose the destination VHD path and file name, once you are happy with that simply click on ‘Create’,  to start building your VHD.

You will then have a short, or long, period where the volume(s) are snapshotted, and then you will see some progress and a quite accurate ETA for the time the process will complete.

2

Once this process is completed i can copy the VHD off to removable media, and begin working with it in Hyper-V.

3

Step Two. Install Hyper-V Server

SO i guess we should get our Hyper-V server ready.

You’ll want to burn that ISO to a DVD or extract to bootable USB media, and boot.

As usual, press the any key to boot…

a1

Windows loads files from your media..

1

Windows is starting..

2

Choose your installation language..

3

Choose your time and date / keyboard preferences..

4

Confirm your settings, and click next..

5

Choose ‘Install Now’…

6

Setup will begin..

7

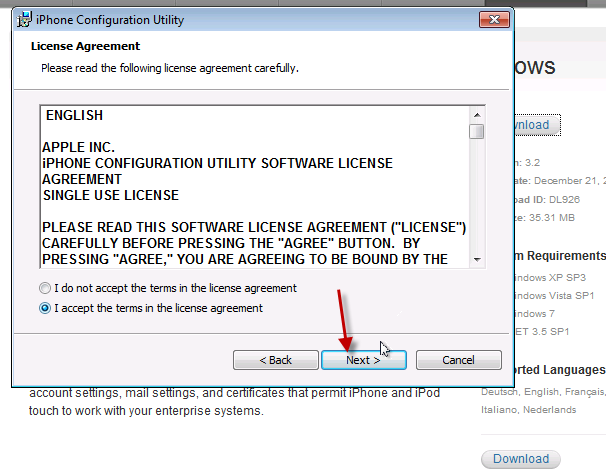
Review the license agreement.. If you accept the terms, check the box and click Next..

8

Choose a ‘Custom’ install..

a5

Here you can choose your disk formatting options, or install raid controller drivers if needed. I just have a single disk in my system and i am not using RAID – this is my lab system remember. If you are doing a real, live, migration you may want to consider the redundancy of your virtual machine. Yes you can always go back to your VHD if you took a copy before you started, but you don’t really want to start again if you can avoid it!

You can click on Drive Options, if you have to partition format the drive in a specific way, or just click Next if you have a blank drive to let the system format and partition the drive for you.

10

Setup will now run through, copying files, expanding files, installing features etc etc…

11

12

13

14

15

16

17

Step Three. Initial Hyper-V Configuration

At first boot, you will need to setup a password for your account. Put some thought in to this, i am running my Hyper-V server in a workgroup. My laptop is also in a workgroup. That means to authenticate between the two we need identically named accounts. (Both username and password) For example if i login to my laptop as Administrator with a password of Rob123 i should set the Hyper-V server username to Administrator, and use a password Rob123. However i wouldn’t recommend you use those :p

18

Enter your password and confirm..

19

Success!

20

Now the system will log you on, and you will get your first look at the Hyper-V Core.

21

So from the home screen, you can get a little bit of info about the server itself, you can see the default hostname, and domain status, you can configure any one of these options by selecting the corresponding number.

22

First thing i will do is add a new local admin, as stated above we need identically named accounts on our workstation with the Hyper-V tools installed.

So press ‘3’ and Enter.

23

Type the new account name, and press enter. The screen will switch over to a traditional command prompt, where you are asked to enter the password for the account, and confirm.

25

If you confirmed correctly, you will be given a congratulatory message!

26

Now i want to enable the remote management of the Hyper-V server, so press 4 and enter.

27

You have several options here, we will go through 1-3 in turn. Start with number 1.

28

29

You will receive a message to say this has completed..

30

Next, use option 2 to enable PowerShell.

31

32

Once the powershell commands have completed you will need to restart.

33

Log back in, and go back to option 4 (Enabled Remote Management), to complete the setup, go to option 3 to enable ‘Remote Server Management’.

34

35

It will take a few moments for all the commands to run and complete…

36

37

Once that has finished, you can press 5 to return to the main menu. (Reminds me of DOS)

38

Step Four. Hyper-V Network Configuration

If you want to change the system name at all, just press 2, then enter. I am happy to leave mine on the random name assigned by setup.

Let’s have a quick look at our network settings.. press 8 and Enter.

39

We can see the NIC’s installed, and the current IP Address. If you want to configure the NIC, press the index number that represents that NIC. So i only have 1 NIC so i can press 0 (zero)

40

You might want to configure a static IP or any other network setting, this is the place to do it. I am going to put my server on a static IP, so i will need to use option 1.

a2

Choosing option 1, prompts me then to use either DHCP (D), Static (S) or to cancel..

Choose S for Static. Then enter your IP details.

a3

When you enter the default gateway you will see the screen refresh and reflect your new address details.

a4

So you can see DHCP is now showing as false (disabled) and my new static IP is displayed

You can press 4 to go back to the main menu.

42

From testing i know that the firewall configuration can be tricky.

However, as this will not be a production box i have decided on my system to just switch off the firewall.

There is a great little tool called HVRemote.WSF which you can obtain from here… this takes a lot of the pain out of configuring the Hyper-V core, especially when you follow the instructions, which IMHO could be just a little clearer, but nether the less work well.

You run it both from the Hyper-V server, and the Client that will control the Hyper-V server (most commands are run from the client) it even has a great switch for diagnosing connectivity issues between the two!

To disable the firewall..

Exit to the command line (option 15) and then type:

netsh firewall set opmode disable

(If you choose to Disable the firewall, instead of configuring, You will need to run that command each time you reboot the Hyper-V Server)

43

As you can see in the screen shot, this command is deprecated now and you are told you should use ‘netsh advfirewall’ instead, but since this command still works, why should we bother??

44

Quick Recap

Now just to recap, at this point we have installed the Hyper-V core, we have configured it for remote management, we have added a like named user to match our workstation/system with the Hyper-V tools running. We have configured our network adapters and turned off the firewall.

Step Five. Connect to Hyper-V Server

Now that your Hyper-V server is up and running, you probably want to add some Virtual Machines, and finish our server virtualisation project?

You will need a machine running the Hyper-V management tools, you can install these as part of the RSAT, or if you already have a server running Hyper-V you can add it as an additional server.

I have a Windows 7 Pro machine running the Hyper-V tools, so i will connect to the Hyper-V Server from there.

Open up the Hyper-V console.

63

Right click ‘Hyper-V Manager’ and click on ‘Connect to Server’

5

Choose to connect to ‘Another Computer’ and enter the IP or HOSTNAME of your Hyper-V Server, and click on OK.

6

After a short delay, you will see your server is added to the console tree. It will display the hostname, whether you added the server by IP or HOSTNAME.

7

Select your server from the list, to begin working with Hyper-V on that server.  You will see that the Hyper-V console is attempting to connect to the Virtual Machine Management service on the remote server..

8

And hopefully in a few seconds you will see….

9

Step Six. Configure your VM

Now we will need to copy our VHD across to the Server, and build our VM.

I am going to attempt to copy my VHD across the network firstly, and then i will walk through the process using removable media.

Before you attempt to power up your VM you MUST move the Hyper-V server to a separate network. You cannot run two Servers on the same Subnet with the same name and IP address.

I ran the disk2VHD tool directly on my SBS server, and stored the created VHD there, so from the Server i will attempt to browse to the Hyper-V server.

So, Click Start, then Run in the run box , enter the UNC path to your server, and as we don’t yet have any shares on the server, let’s try to go for the c$ share.

10

Hopefully you are prompted to login, so enter the administrator username and password.

11

If you entered the correct credentials you should now see your C: on the Hyper-V server. Add a new Folder to store your VHD file.

Right click, new > folder. Name the folder VHD and press enter.

12

Now we can just try to drag and drop our VHD file across..

13

Sit back and grab a coffee, it might take a while!

14

When the copy has completed we can switch back to our Hyper-V server and configure the VM.

15

If you want to use removable media instead, copy the VHD to your media from the source server, plug that media into your Hyper-V server, and you can use the xcopy tool from a command line to copy it across. You might want to use DISKPART to identify which Drive letter your Media has been assigned.

From a command prompt, type..

DISKPART <enter>

LIST VOLUME <enter>

This will show you the volumes on your system, their size, and assigned drive letter.

From here you can gauge which drive is your removable media, and it should be simple enough to copy the file across.

Now we need to configure our networking. My Microserver only has one NIC so i am not able to have a dedicated NIC for management and one for the VM.

In the Hyper-V console, load up the ‘Virtual Network Manager’

16a

Our VM will need physical network access, so we will need to create an ‘External’ Network. Click Add.

17

You will need to enter a name for your network, you may want to add some notes about it’s purpose/function within your Hyper-V setup, you also need to confirm the physical NIC the network will bind to, and whether or not the Host OS will have access to share this NIC. There are also some other settings which we do not need to worry about.

18

As i said, i only have the one NIC, so i am leaving all of the defaults here.

Enter a name you are happy with, and click on OK to setup the network.

19

With a single NIC configuration you may have some temporary disruption when you click on OK. You will be prompted to acknowledge this by clicking ‘Yes’ in a warning dialogue box.

20

21

Once the server has applied your networking configuration, you can go ahead and run the New Virtual Machine Wizard.

22

Right click the Server Name, highlight New, then select Virtual Machine.

23

Review the information on the ‘Before you Begin’ page, even if you have done it before it is always useful to review this type of information.

Click Next when you are ready.

We will need to name our Virtual Machine – this name will be what is shown within the Hyper-V console. You may also choose to move the configuration information to a non default location.

24

25

When you are ready, click Next.

Choose your memory allocation. My Physical server had 1GB of Ram, so i am going to allocate 1GB here. You may want to allocate more if your system has the free memory. My Microserver only has 2GB installed, and remember SBS 2003 only supports up to 4GB of RAM.

When you are ready click Next.

Choose your Network from the dropdown menu. I only have the one to choose. Click Next. (You can ignore this step for Windows 2003 as it does not support the Hyper-V synthetic NIC by default)

28

Next we choose our VHD. We don’t want to create a New VHD here, so choose to ‘Use an Existing VHD’ and type the path information to the VHD file, you ‘may see it auto-completes for you!

When you are happy with the VHD information, click Next.

30

Review the settings shown, and if you are happy, click on Finish.

31

Your new Virtual Machine will now be shown in the details pane of the Hyper-V console.

32

Step Seven. VM Network Configuration

Now, because we are running Windows Server 2003, we will need to use a ‘Legacy Network Adapter’

Right click the VM, and click Settings.

47

It should open on the ‘add hardware’ screen, select ‘Legacy Network Adapter’ and click Add.

48

Again, here you need to choose which network to connect the NIC to, and click on Apply.

49

Click on OK to close down the settings page.

50

Your NIC is now installed.

Now remember when we startup, it will be like we have replaced the NIC in a physical server, so there will be some configuration required and the SBS BPA can help us with that.

All that is left to do is start it up!

Step Eight. Power Up your VM!

Remember, your Hyper-V Server should now not be located on the same LAN as your source server.

Double click the VM to connect to it, then click on the green Power Button to power on.

33

You may be prompted for credentials due to the way the VM, and Hyper-V interact with the remote Hyper-V system, simply login with credentials valid on the remote Hyper-V Server.

34

Once you have logged in you will see the VM at whatever state it has got to in the boot process, it does not wait whilst you enter credentials!

38

After a short time you will be at the CTRL-ALT-DEL screen and you can login. (CTRL ALT END on Hyper-V) (CTRL ALT LEFT ARROW, to get your mouse focus back to your local pc)

Once logged on, you can see your server is at exactly the point when we made the disk2VHD snapshot.

52

At this point you should have a booted SBS 2003 system.

Step Nine. Testing your VM

Your next step is to run the SBS BPA and resolve any issues highlighted. Remember your VM functions just like the real thing, so any issues in the registry that pre-existed for example, still exist.  The main issue you are likely to see relates to having a new NIC installed on the system when SBS is tied to the other NIC. This error is the result in a change in the ‘LANNIC’  registry value.. the registry key is located here:

HKLM>Software>Microsoft>SmallBusinessServer>LANNIC

54

The above shows the current value of the GUID for our LANNIC. If that NIC is removed you might experience errors on the system, and services like DHCP may not work as expected.

The solution is to find the GUID of your actual LAN NIC, copy it down, and replace the value shown above, with your actual GUID.

To find the GUID of your NIC, go to, HKLM>System>Services>TCPIP>Parameters>Interfaces

55

Step Ten. Back to the Future..

No not a direction to sit in front of a DVD, but i needed a good name for the last step.

At this point you should have a fully functional SBS 2003 Virtualised, on Microsoft’s free Hyper-V server. You are now free to test migrations, patches, backups, anything you like, safe in the knowledge that your physical server, is safe from, well, you!

So you are back, where you started, which is, looking to the future… of your network and a server upgrade?  ok that was awful but hopefully you get the point!

I hope you have found this useful, if not a little entertaining.

Links..

HP Microserver
http://h10010.www1.hp.com/wwpc/us/en/sm/WF05a/15351-15351-4237916-4237918-4237917-4248009.html

Hyper-V system Requirements
http://www.microsoft.com/hyper-v-server/en/us/system-requirements.aspx

Disk2VHD
http://technet.microsoft.com/en-us/sysinternals/ee656415.aspx

Hyper-V Download
http://www.microsoft.com/downloads/en/details.aspx?FamilyID=48359dd2-1c3d-4506-ae0a-232d0314ccf6&displaylang=en

Hyper-V Management Tools (RSAT Updated for Windows 7 w/SP1)
http://www.microsoft.com/downloads/en/details.aspx?FamilyID=7d2f6ad7-656b-4313-a005-4e344e43997d&displaylang=en

ISO Extraction
http://www.magiciso.com/download.htm

USB Bootable Media Guide
http://www.nogeekleftbehind.com/2010/12/22/how-to-install-sbs-2011-with-a-bootable-usb-drive/

HVRemote
http://archive.msdn.microsoft.com/HVRemote

Thanks to Tim Barrett, for his awesome editing and ideas!

iPhone Configuration for the SBS Administrator Part 2

I will assume you have uploaded the mobileconfig file using your favourite FTP Client, now we can switch to our iPhone.

Open up Safari and navigate to your file.

If you receive an error about the profile not being able to be installed – check your navigating to the correct link.

You will be presented with a screen detailing what the profile is for, and there is an option to click on to Install.

If you click install, you get a message appear on the screen about installing an unsigned profile, and a notification to say it will change settings on the phone. You have the choice to install or cancel.

Clicking Install Now, will start the wizard based installation. Enter your email address, and click Next.

Enter your username, including your internal domain name in the format domain\username and click next.

Enter your password, and click next.

You will see the phone is installing your profile

Depending on your Exchange server security settings, you may have to enable a PIN code on your phone, now is the time you will be prompted to enter a code. This PIN will be used to lock your phone after periods of inactivity – like any normal PIN used on a phone.

You will be asked to confirm your code, and then you will be shown a screen that says the profile has been installed.

If you then close Safari and go to Settings, Mail, Contacts and Calendars, you will see your Exchange account listed, like any other would be and from here you can see which options have been configured by your profile.

So that concludes the process of using the iPhone configuration utility to help configure your iPhones.

* So now that you have followed this through you might be wondering why this is any easier than talking a user through this process? My idea for this process is for an IT Consultant to have a folder per client on his or her website, imagine :

http://www.someconsultancy.com/iPhones/clienta/iphone.mobil…

http://www.someconsultancy.com/iPhones/clientb/iphone.mobil…

So you client calls you up and says, “hey i have a new iPhone, and i need my email” or hopefully ahead of time they let you know they have an iPhone coming, you can make sure they have the link to their .mobileconfig file either by SMS to their phone,  or email to their client computer where they can copy it down.

I see the benefit here that you may even be able to delegate this off to your onsite contact who doesn’t then need to know all the in’s and outs of configuring the iPhone just that they go to xyz link and follow the wizard.

Of course you could have a password protected folder for each customer on a webserver, that has a page with a  hyperlink in it rather than the full URL..

iPhone Configuration for the SBS Administrator Part 1

EDIT – 28/10/2011 If you just want to know the settings required to connect your iPhone to your SBS Server, look at this post.

If like me, you support a variety of different customers and devices you’re now likely to have one or two, or maybe an army, of people using an iPhone or iPad on the road to pickup their MS Exchange email.

If you are just looking for some assistance setting up an iPhone or iPad with SBS 2011 – Check this Post

I’ve preferred a device that directly syncs to Exchange over a Blackberry since i started working with Blackberry’s 3 or 4 years ago.

As more and more of our customers came to us with iPhones and we talked more and more of them through adding an exchange account i started to think about how this might be achieved a little less painfully.

Sure, we can do this for our users but we like to  work remotely, and you don’t really want to have to have physical contact with a device in order to configure it. I found a solution, and what follows is my interpretation on how to implement it*.

Before you begin:

In order to follow this procedure through, you will need to download the iPhone configuration utility here, you will almost certainly want access to an iPhone (Mine is an iPhone 4) you will need access to an SBS server (2003 or newer) with Exchange ActiveSync published to the internet. You will also need a web server to host a file on, preferably in a folder you can password secure.

All set? great.

So lets go ahead an install the iPhone configuration utility, i am using version 3.2.

From the link provided above, click download, choose a location to save your file and away you go.

Navigate to your saved file, and run it.

On the welcome to iPhone configuration utility installer page, click Next.

Review the license agreement, and if you agree click to accept the terms, and click Next.

Review the path the program will install to, and click Next.

It will take a few minutes for the program to install…

I am installing on Windows 7, so i have several UAC prompts to acknowledge.

Once installed, let’s run our Utility.

As the program opens up, you will see several areas on the left hand side.

Devices

Applications

Provisioning Profiles

Configuration Profiles

We are only interested in Configuration Profiles in this article.

Click File, and select ‘New Configuration Profile’

A new area will open up on the right hand side.

You will need to enter a name for your profile, a unique identifier for this profile, the organization name and a description about what the profile is for.

Name: Quite simply a name you can use to identify this profile.

Unique Identifier – This relates to comparing an already installed profile. So if you have two that match one may update the other. This is a little beyond the scope of what we are trying to achieve here, so i am entering something descriptive, in line with the format suggested.

Organization – Just the name of the company this profile is for.

Description – It’s a description!

Security – Here we can control when the profile can be removed, i like to be a little cautious when working with mobile devices so i leave this so the profile can be always removed.

Now with the general settings finished, lets move on to the Exchange settings. In the left hand pane notice the Exchange Active Sync logo, click on this.

You will see a message about using this section to define settings to connect to Exchange, and also a referral to the a useful PDF guide on using Apple devices with Exchange, this can be found here.

Let’s click on Configure.

We will need to fill out the information here in order to configure our profile to sync with our server.

Account Name – The name of the account as seen on the device

Exchange ActiveSync Host – the FQDN of your exchange server (remote.mydomain.com)

Use SSL – by default EAS will function using SSL so i will leave this checked.

Domain / User / Email Address / Password – These sections will be left blank.

Past days of Mail to Sync – How many days of email to sync by default?

Authentication Credential Name – left blank.

That is our profile configured. Now we need to export it.

Click on File, and on Export.

In the Export Configuration Profile wizard that opens, you have the chance to sign your profile, sign and encrypt a profile for each device, or to choose None.

Since i am not an expert in Apple’s configuration utility, and i don’t have a huge budget to work with, i haven’t really explored the options and differences between them here. Suffice to say, Signing the file, and Encrypting the file seem to work well on a per device basis, aside from that the only downside to not signing them is you see that the profile is unsigned on the iPhone. Granted it doesn’t look as pretty but I’m pretty sure no one will notice.

OK, so lets go for the None option for security in the export profile wizard. You will need to enter a name for your file, and then your profile is exported.

I am calling mine – sbsip – short for sbstips iPhone. You will do well to choose a short name as well, as you will see in a moment. Note the file extension  .mobileconfig

We now need to move this to our web server. FTP seems to be the wise choice here, but a word of caution.

Since this file may contain what some deem to be sensitive information in plain text, i would advise you to consider the security implications of uploading this file before you do so. Just because this will make your life a little easier doesn’t mean your client agrees. If you have followed the article to this point, the sensitive information i am referring to is the address of the EAS server.

If you open up your .mobileconfig file, you can see it is simple XML and the info is easily readable.

Below is a ‘Signed’ version, so you can see the extra detail here is the addition of a signature, but the information itself is not hidden.

So with that warning heeded, a password protected web folder is my recommendation. Users can follow a link on their device, you can provide them a username and password for this folder, and that grants them access to this file. There are of course other methods of doing this, only uploading the file when it is needed for example could be one, but seems like a lot of effort to me..

Continued in Part 2….